Halloween sugar cookies prove that a little butter, flour, and icing can become pure magic. The dough is wonderfully forgiving, holding crisp edges so every bat wing or witch hat keeps its shape. Once cooled, each cookie becomes a blank canvas ready for orange flood icing, black piping, and candy eyeballs. The ideas below range from classic pumpkins to playful goblins, giving you fresh inspiration for every spooky gathering.
Contents
- 1. Classic Jack-o’-Lantern Faces
- 2. Friendly Ghost Silhouettes
- 3. Candy Corn Striped Cookies
- 4. Mummy Bandage Cookies
- 5. Black Cat Cut-Outs
- 6. Spiderweb Royal Icing Cookies
- 7. Witch Hat Sugar Cones
- 8. Haunted House Windows
- 9. Pumpkin Spice Sugar Leaves
- 10. Glow-in-the-Dark Monster Eyes
- 11. Day of the Dead Sugar Skulls
- 12. Bat-Wing Minis
- 13. Cauldron Bubble Cookies
- 14. Frankenstein Bolt Cookies
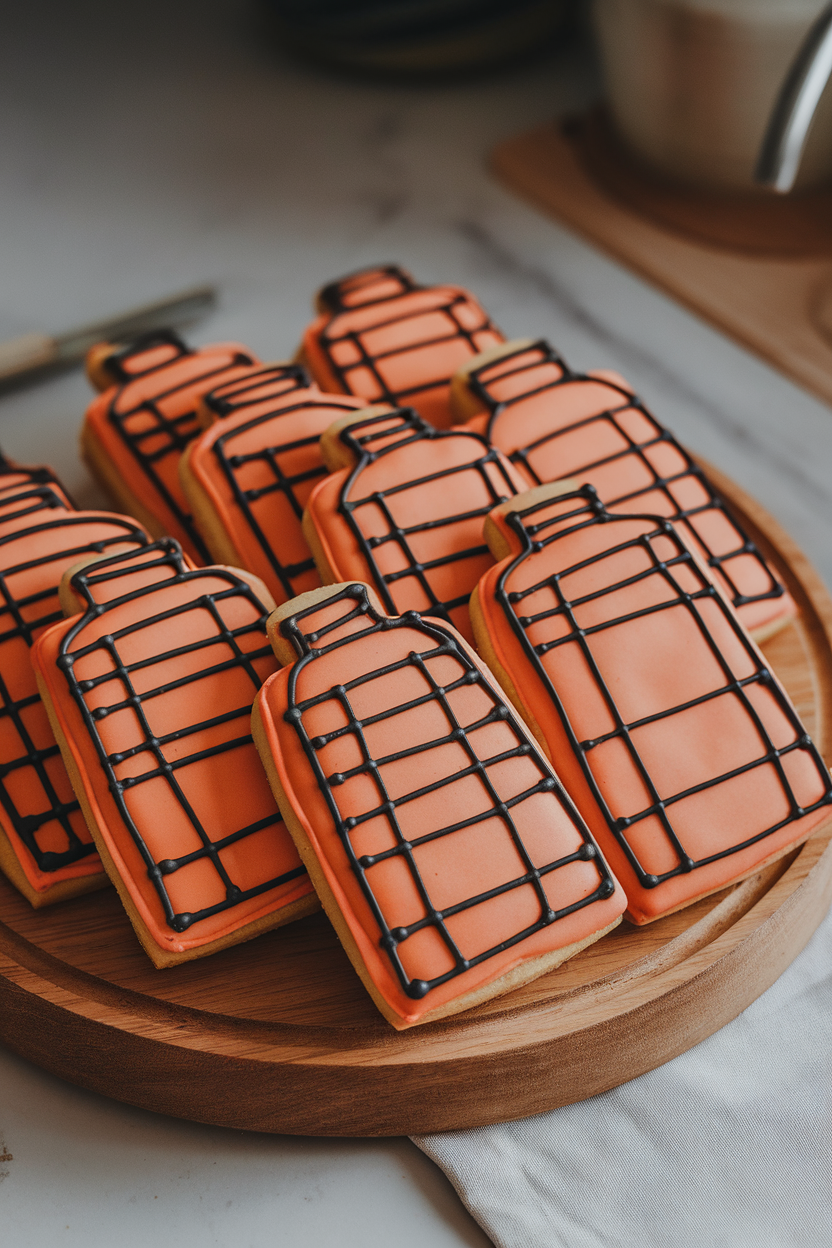
- 15. Magic Potion Bottles
- 16. Skeleton Bones Sticks
- 17. Harvest Moon Rounds
- 18. Creepy Coffin Sandwich Cookies
- 19. Autumn Leaf Marbled Cookies
- 20. Poison Apple Bites
- 21. Graveyard Tombstones
- 22. Friendly Vampire Fangs
- 23. Scaredy-Cat Paw Prints
- 24. Spooky Owl Eyes
- 25. Crystal Ball Glaze Cookies
- 26. Candy Bucket Minis
- 27. Boo Letter Cookies
- 28. Tiny Trick-or-Treat Bags
- 29. Moon & Stars Night Sky
- 30. Giggling Goblin Faces
- 31. Rustic Hay Bale Squares
- 32. Bewitched Broomsticks
- 33. Mini Monster Mash Faces
- 34. Pumpkin Patch Plaques
- 35. Creepy Crawly Centipedes
- 36. Caramel Apple Slices
- 37. Haunted Clock Faces
- 38. Starry Midnight Cats
- 39. Foggy Graveyard Gates
- 40. Witchy Shoe Buckles
- 41. Harvest Scarecrow Smiles
- 42. Eerie Eyeball Spritz
- 43. Little Lanterns
- 44. Sugar Maple Spinners
- 45. Bewitched Book of Spells
- 46. Autumn Sweater Patterns
- 47. Playful Polka-Dot Pumpkins
- 48. Hooting Barn Owl Feathers
- 49. Witch Cauldron Clouds
- 50. Sparkly Candy Corn Hearts
- 51. Cozy Campfire Flames
- 52. Crescent Moon Cats
- 53. Spiced Bat Wings
- 54. Ghost in the Window Panes
- 55. Haunted Lantern Glow
- 56. Skeleton Key Shapes
- 57. Pumpkin Pie Slice Cookies
- 58. Silly Zombie Faces
- 59. Harvest Wheat Sheaves
- 60. Trick-or-Treat Door Knockers
- 61. Cobweb Corner Squares
- 62. Leaf-Piled Pumpkins
- 63. Moonlit Pumpkin Carriage
- 64. Spooky Storybook Pages
- 65. Midnight Raven Silhouettes
1. Classic Jack-o’-Lantern Faces
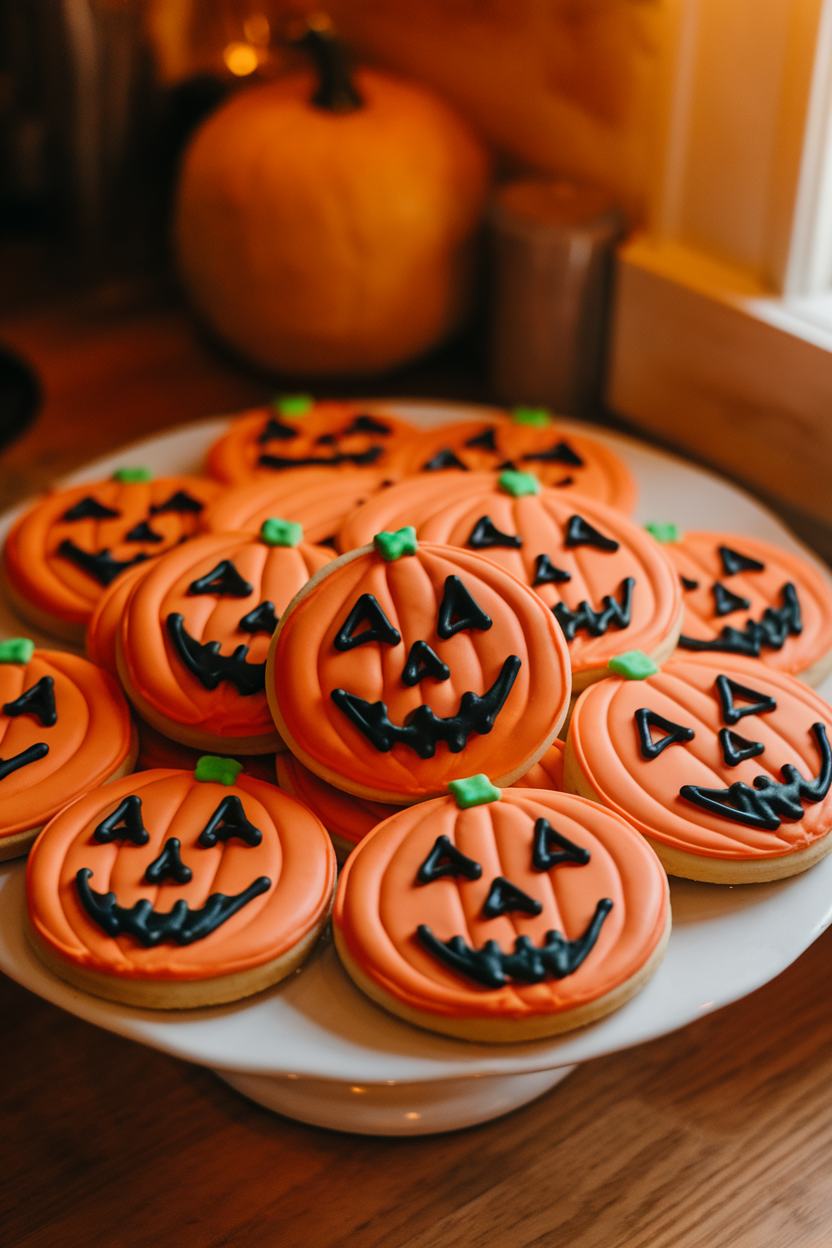
Start with a pumpkin-shaped cutter, then flood the surface with orange royal icing. Once it crusts, pipe goofy or toothy grins in black and add a little green stem. The simple design is beginner-friendly yet always draws smiles at class parties.
2. Friendly Ghost Silhouettes
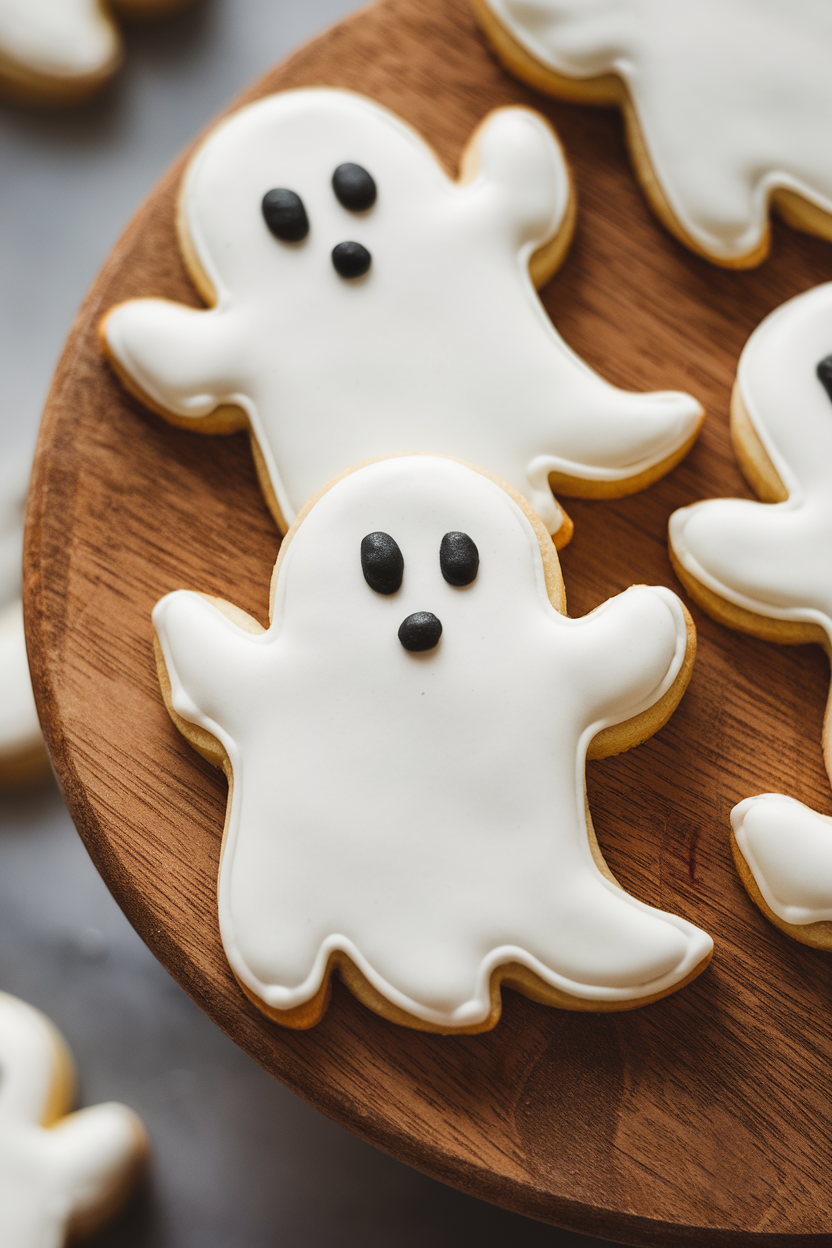
Use a bell or ghost cutter, flood the cookie with bright white icing, and add petite black dots for eyes. The lack of detail makes these quick to finish when you’re short on time. They pair beautifully with hot cocoa on chilly October nights.
3. Candy Corn Striped Cookies
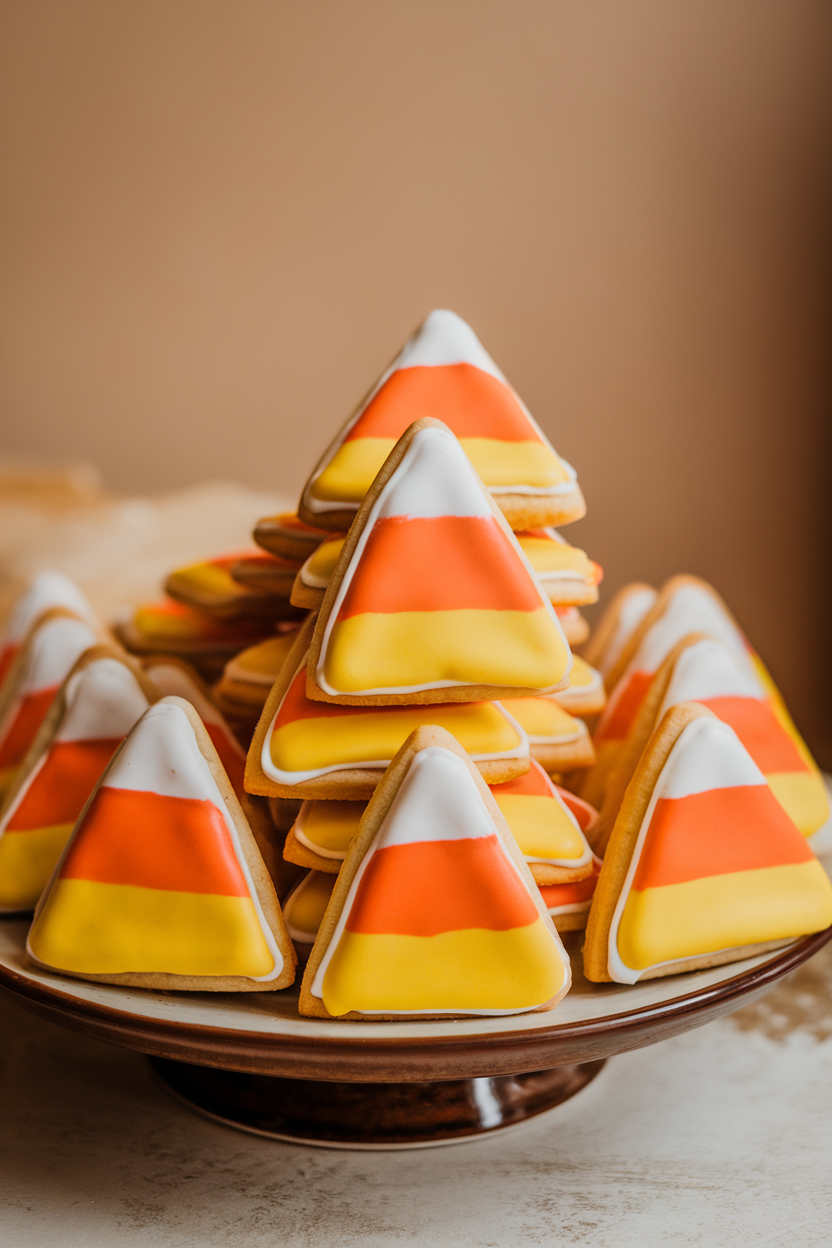
Cut triangles from chilled dough and flood each section separately, starting with white at the tip. Let every color set for crisp lines, then move on to orange and yellow. The finished cookie tastes far better than the actual candy.
4. Mummy Bandage Cookies
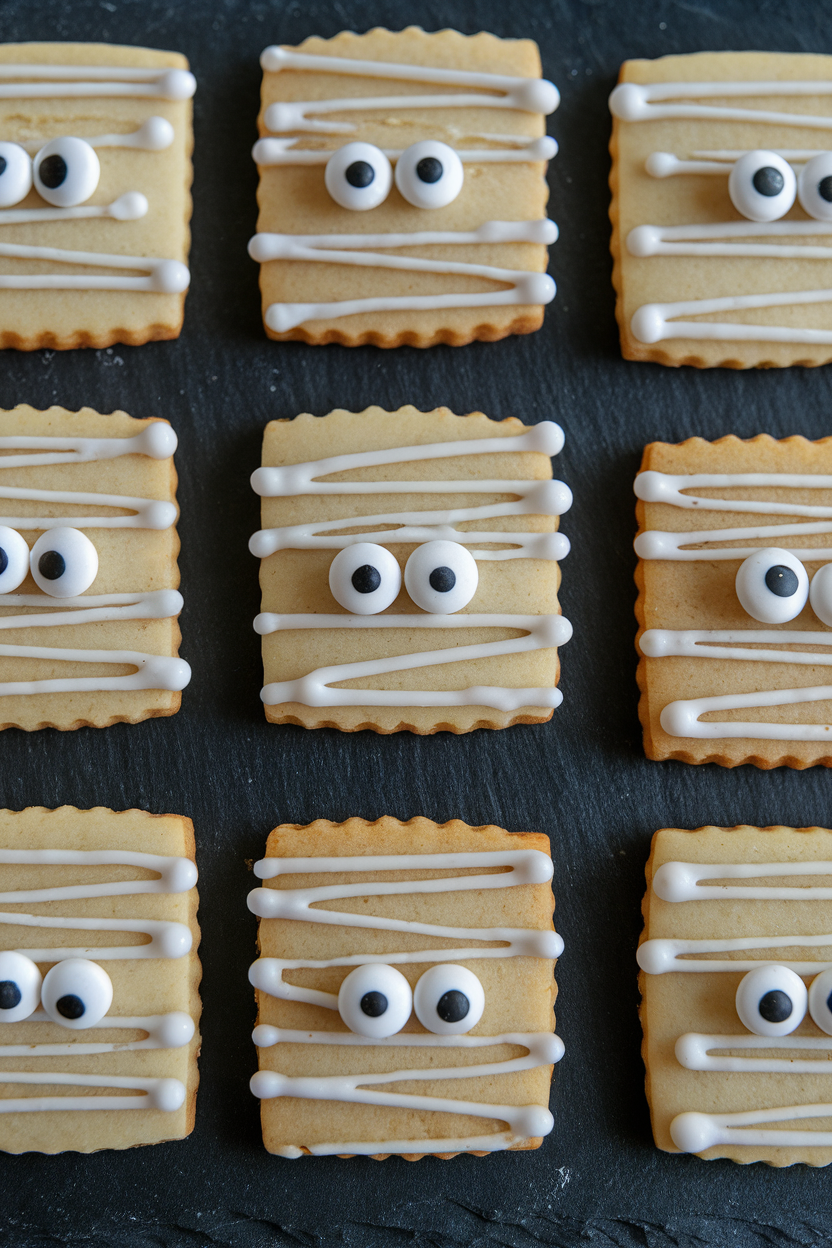
Flood the base with a light tan or gray, then pipe uneven white stripes to mimic gauze. Leave small gaps for candy eyeballs to peek out. The intentionally messy look means perfection isn’t required, making these ideal for decorating with kids.
5. Black Cat Cut-Outs
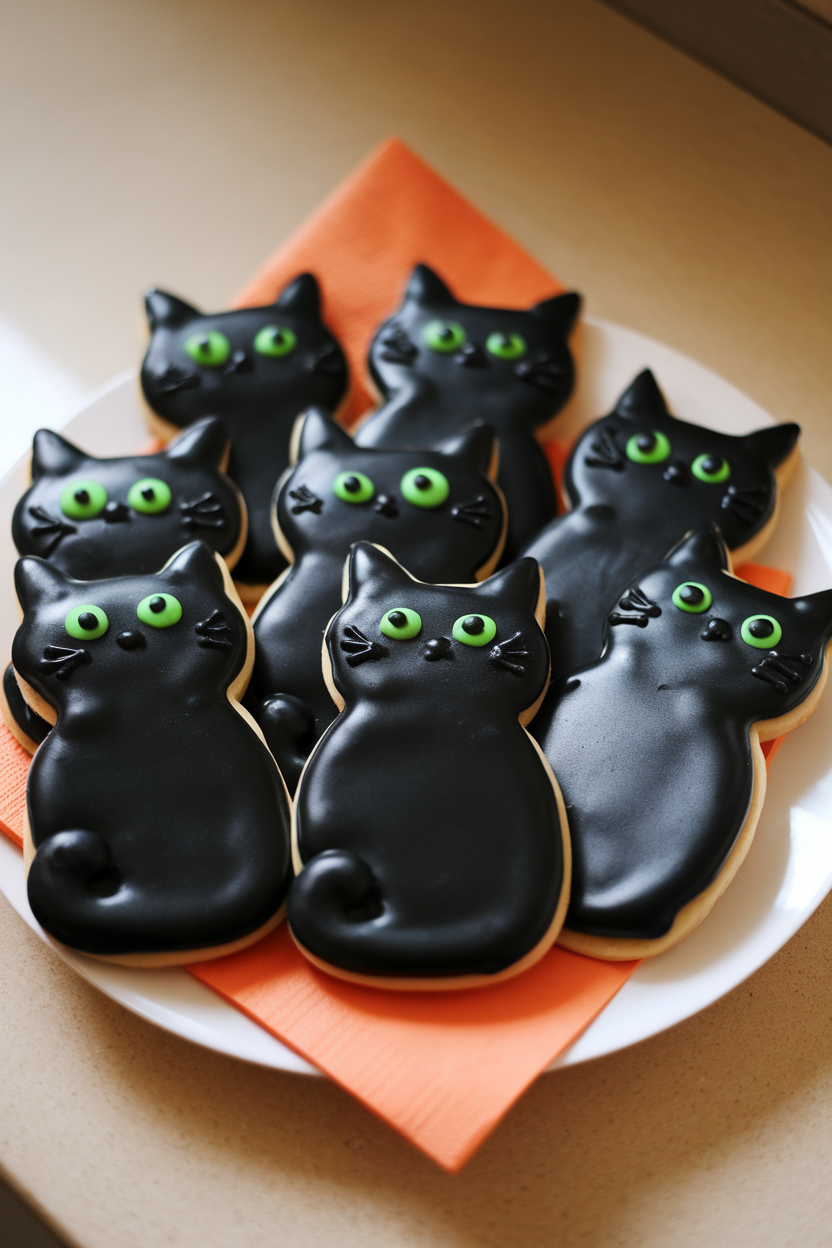
Black gel food coloring turns royal icing pitch-dark without a bitter taste. Add a hint of edible shimmer dust for a sleek fur effect. Two dots of green icing or sprinkles create hypnotic feline eyes.
6. Spiderweb Royal Icing Cookies
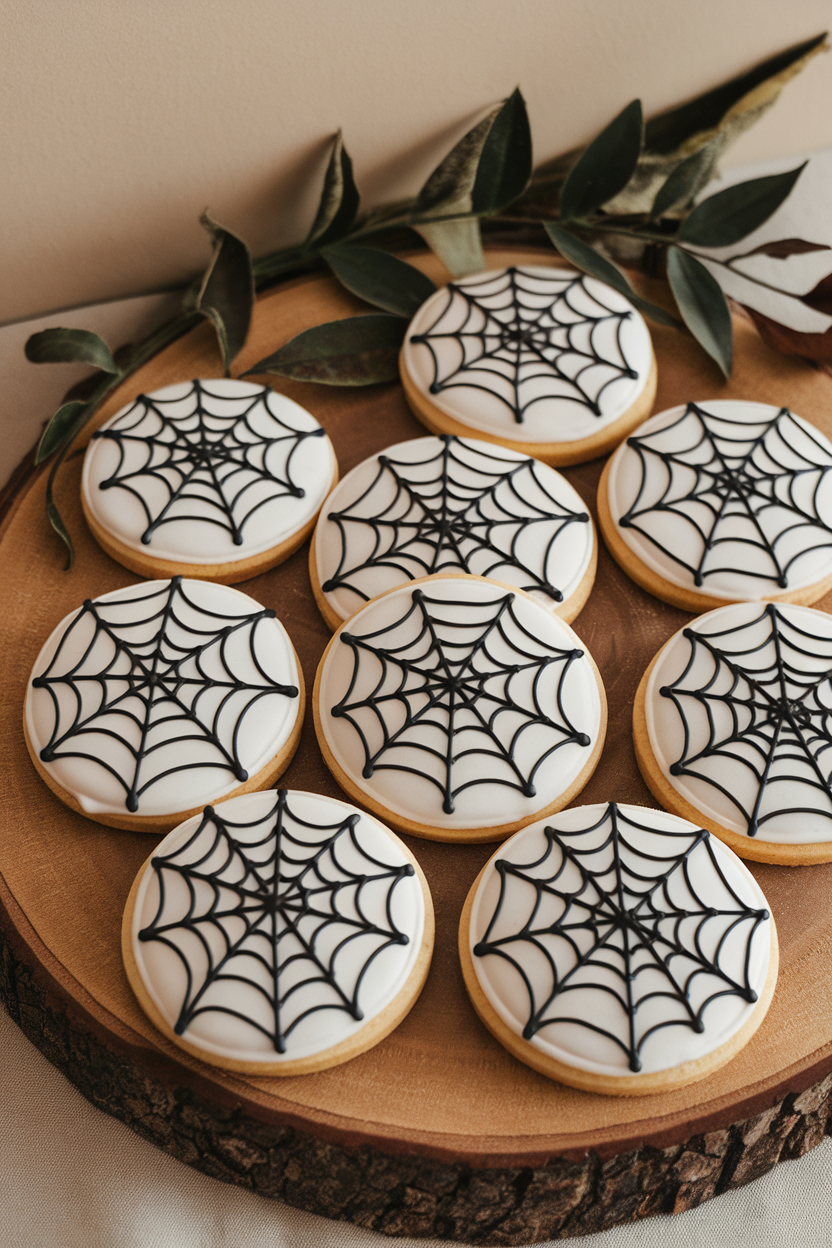
Flood in white, then quickly pipe concentric black circles before dragging a toothpick outward to form a web. The wet-on-wet method yields sharp lines with minimal effort. Serve alongside plastic spider rings for a playful touch.
7. Witch Hat Sugar Cones
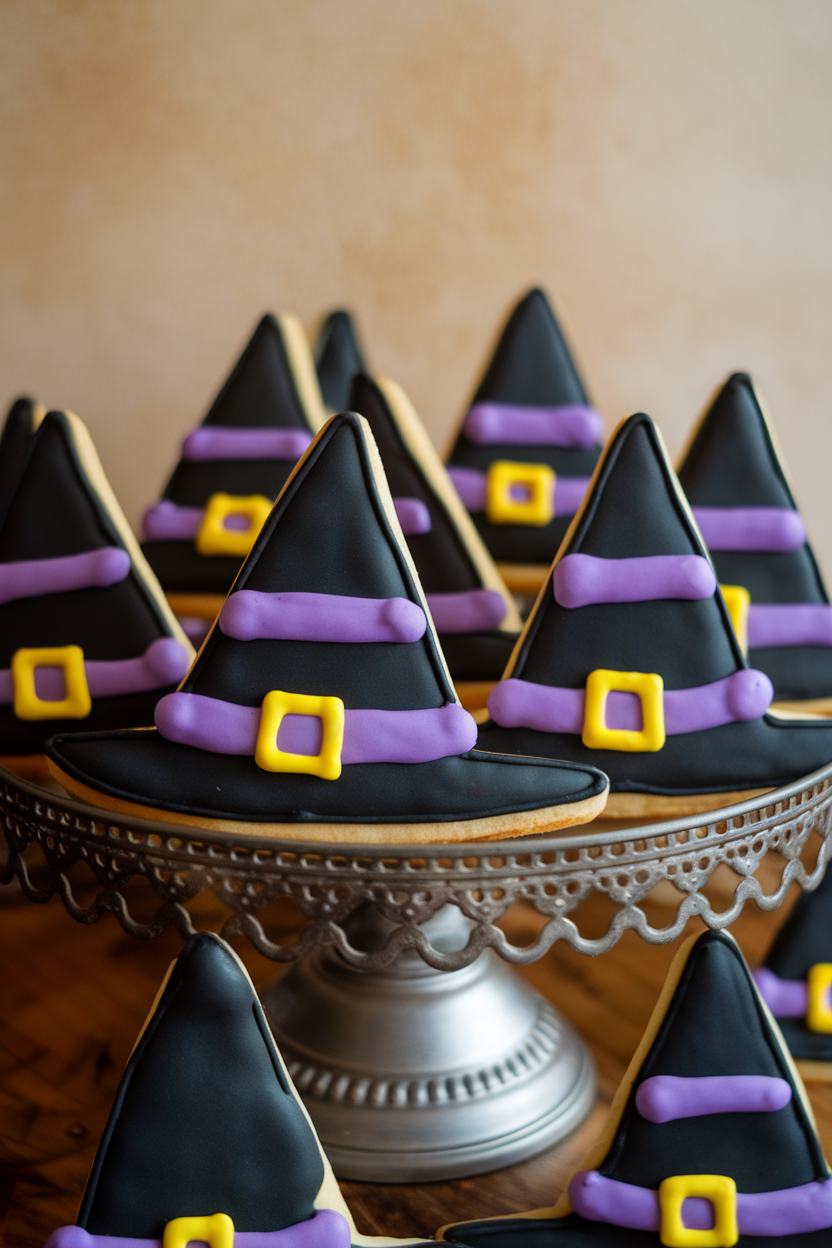
A triangle cutter forms the hat, while a smaller strip becomes the brim. After flooding with black, add a bright band and buckle for contrast. The finished hat pairs well with pumpkin-shaped cookies for a thematic platter.
8. Haunted House Windows

Outline a house, flood with dusk-gray icing, and let it dry fully. Pipe glowing yellow squares to mimic windows against the night. Tiny bats or smoke trails add extra atmosphere for advanced decorators.
9. Pumpkin Spice Sugar Leaves
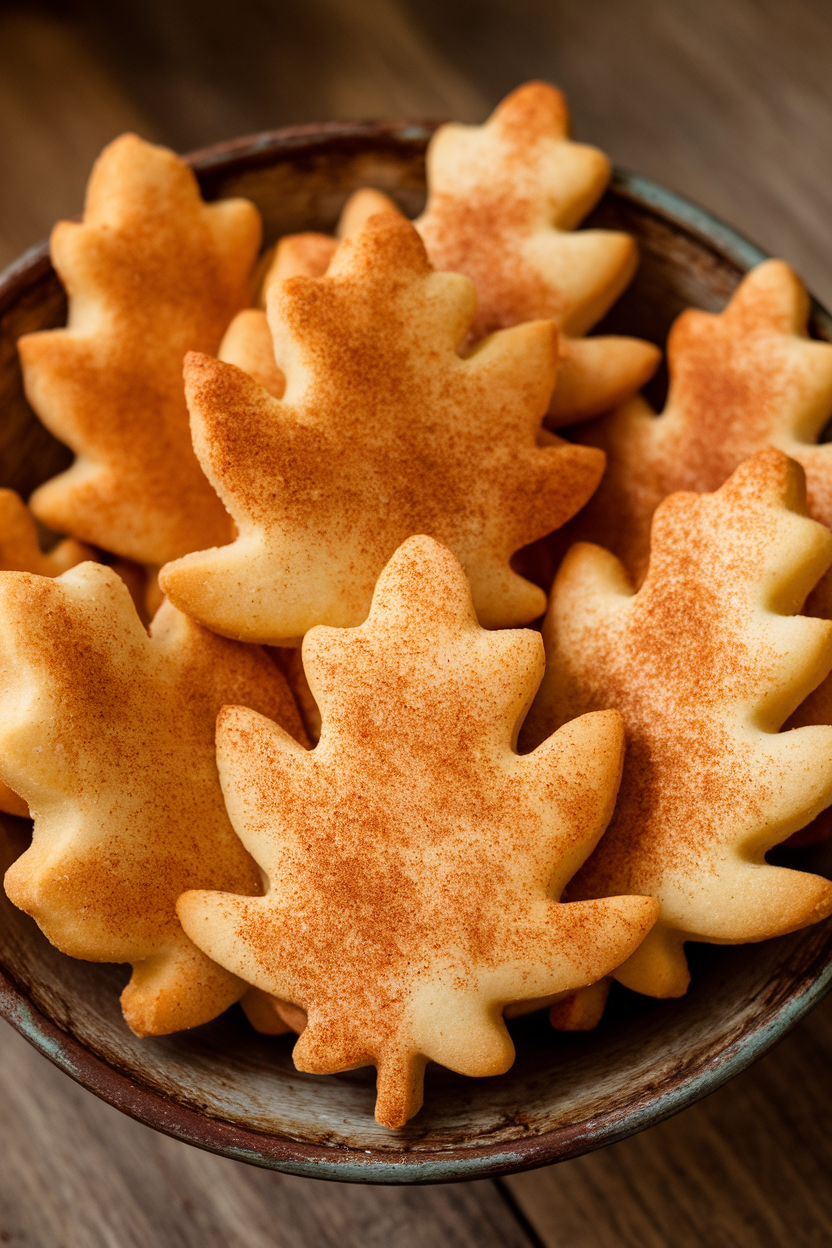
Stir pumpkin pie spice into the dough for autumn flavor without extra moisture. Tint icing in marbled oranges and browns for a realistic fall palette. A sprinkle of cinnamon sugar gives each leaf gentle sparkle.
10. Glow-in-the-Dark Monster Eyes
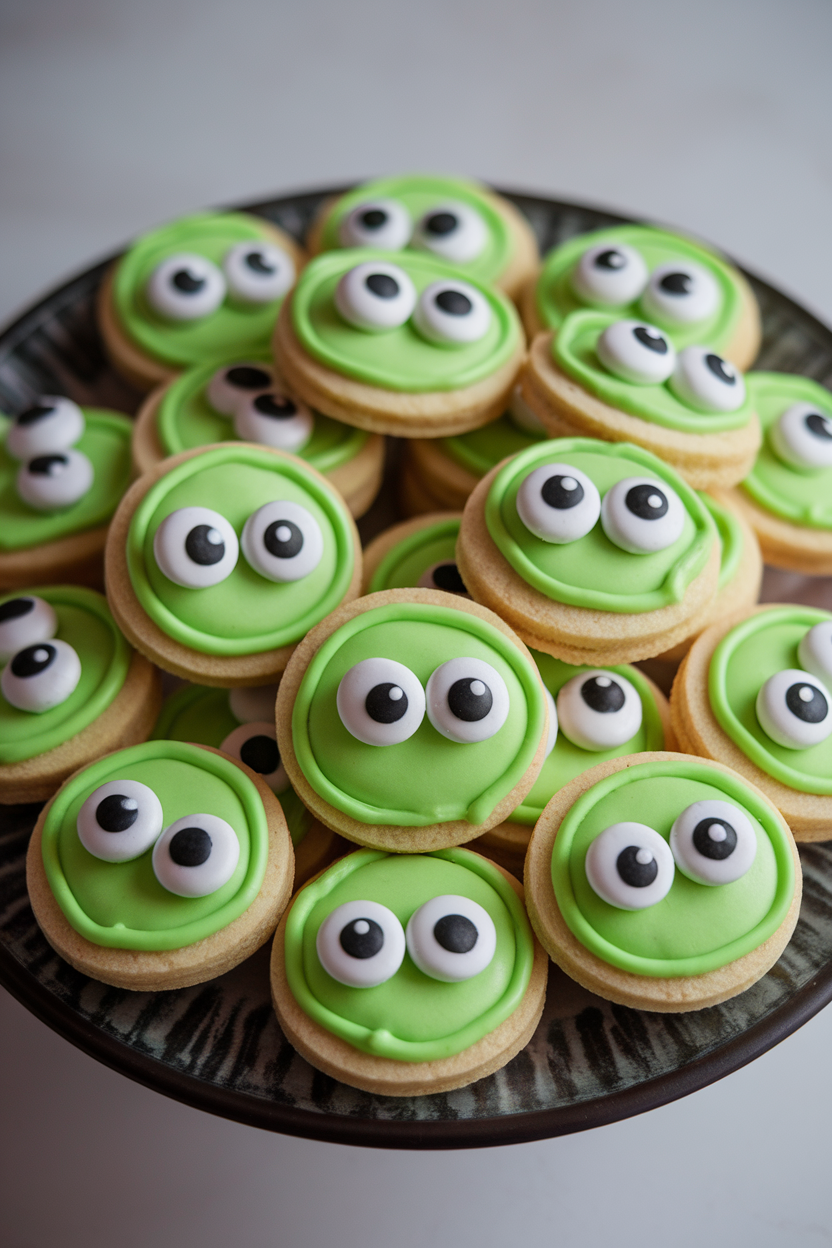
Neon gel colors yield icing that pops under blacklight at haunted-house parties. Flood, let set, and dot on candy eyes in mismatched sizes for comic effect. Kids love arranging the cookies so the eyes seem to follow guests around the room.
11. Day of the Dead Sugar Skulls
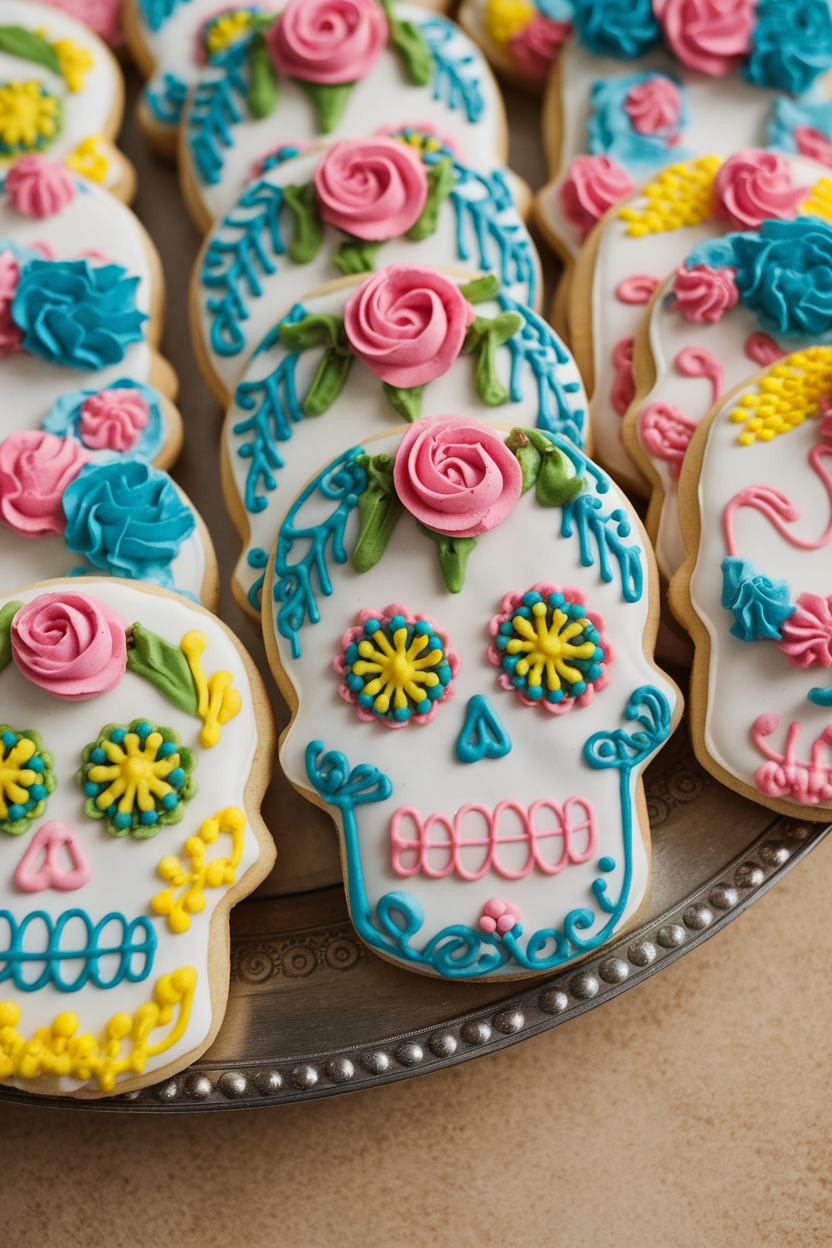
Flood cookies white, then use food-color markers or fine piping tips for intricate designs. Flowers around the eyes and lacy borders celebrate Día de los Muertos heritage. These cookies double as colorful table decor until dessert time arrives.
12. Bat-Wing Minis
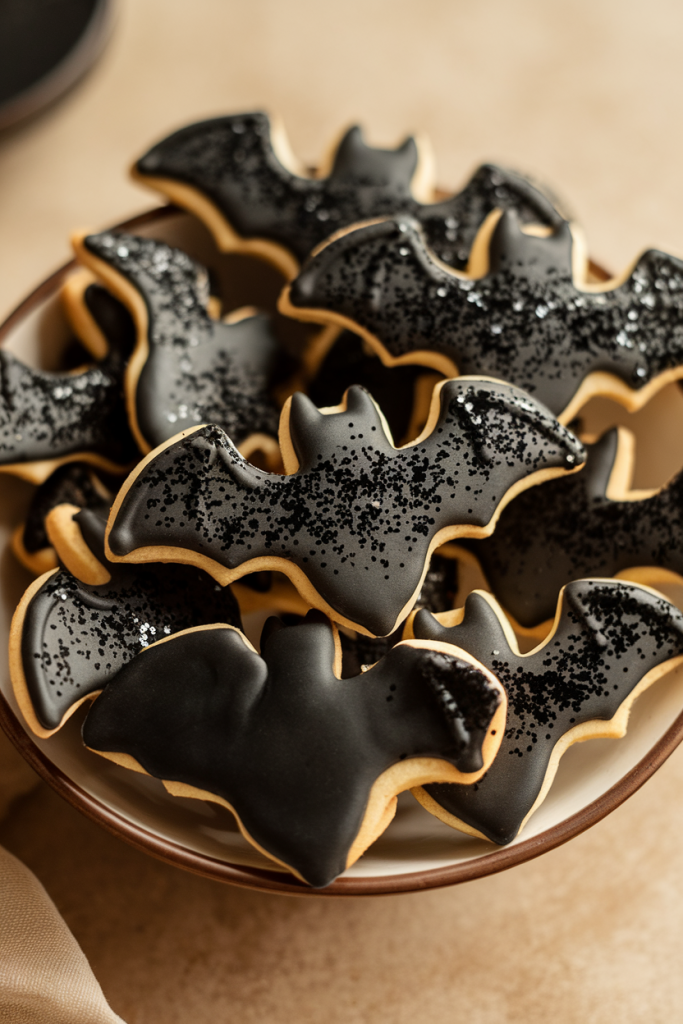
Mini cutters make bite-size wings perfect for party snacking. Matte black icing keeps crumbs tidy and hides minor mistakes. A dusting of black sanding sugar adds subtle sparkle without changing flavor.
13. Cauldron Bubble Cookies
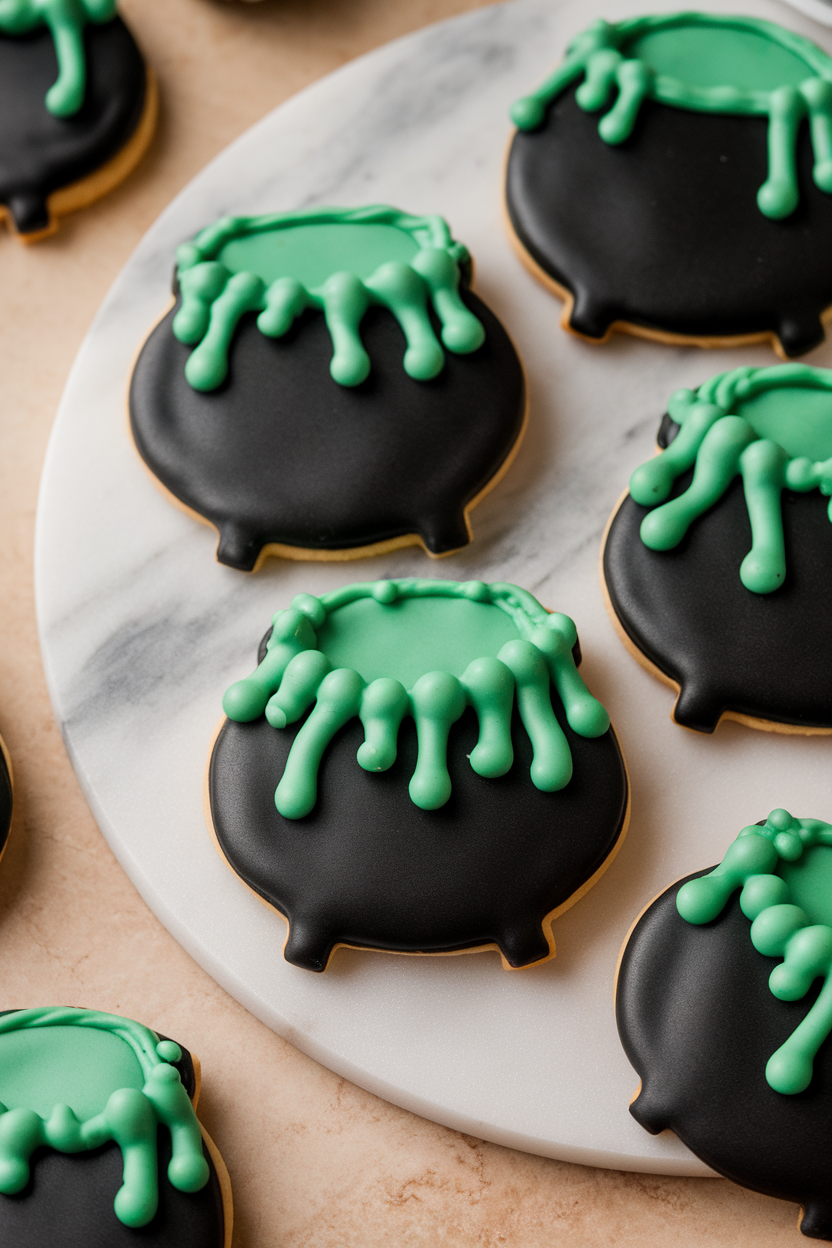
Flood a circle with black, then pipe a thick green “potion” across the top third. Add royal-icing bubbles with white highlights to give the illusion of froth. Edible pearl sprinkles mimic fizzing brew and add crunch.
14. Frankenstein Bolt Cookies
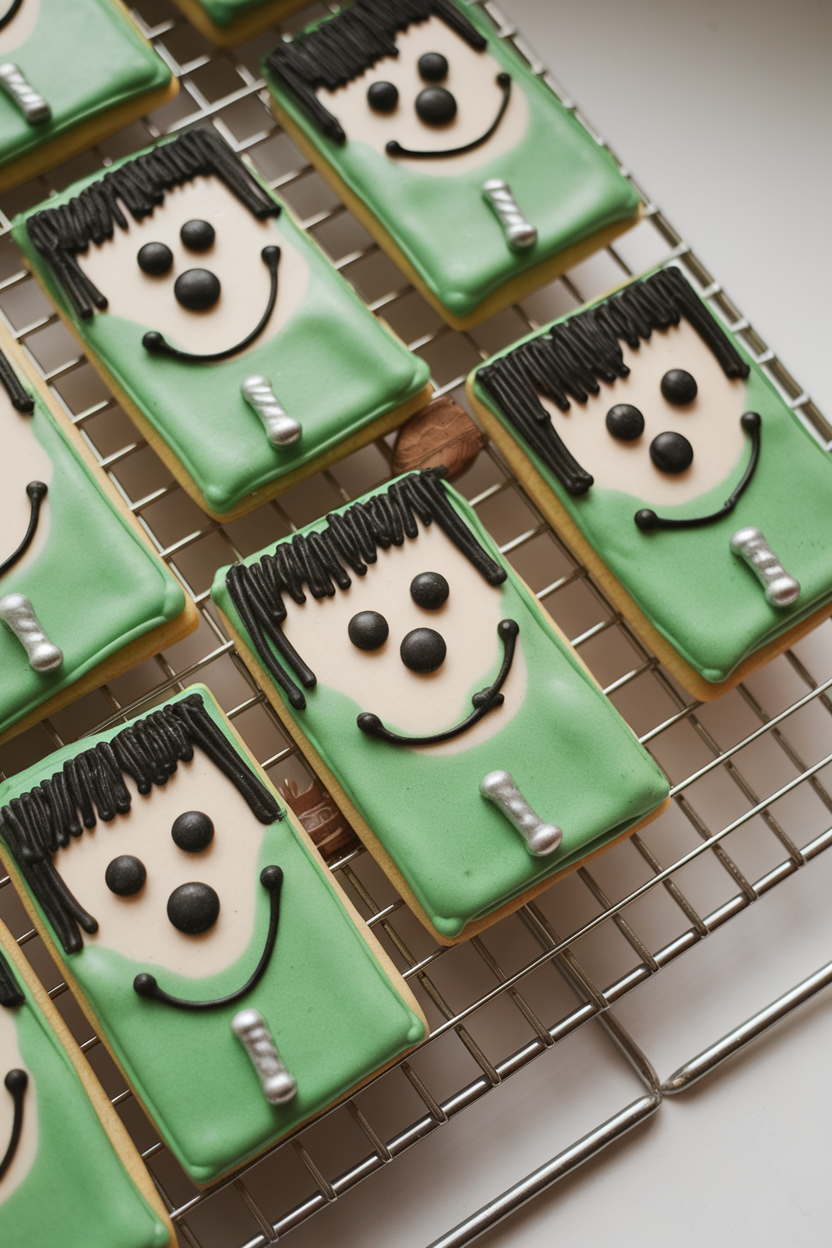
Shape rectangles or use a mason-jar cutter for the silhouette. Green flood icing forms the face; black zigzags become hair. Attach silver dragees or mini pretzel sticks as neck bolts for a playful finish.
15. Magic Potion Bottles
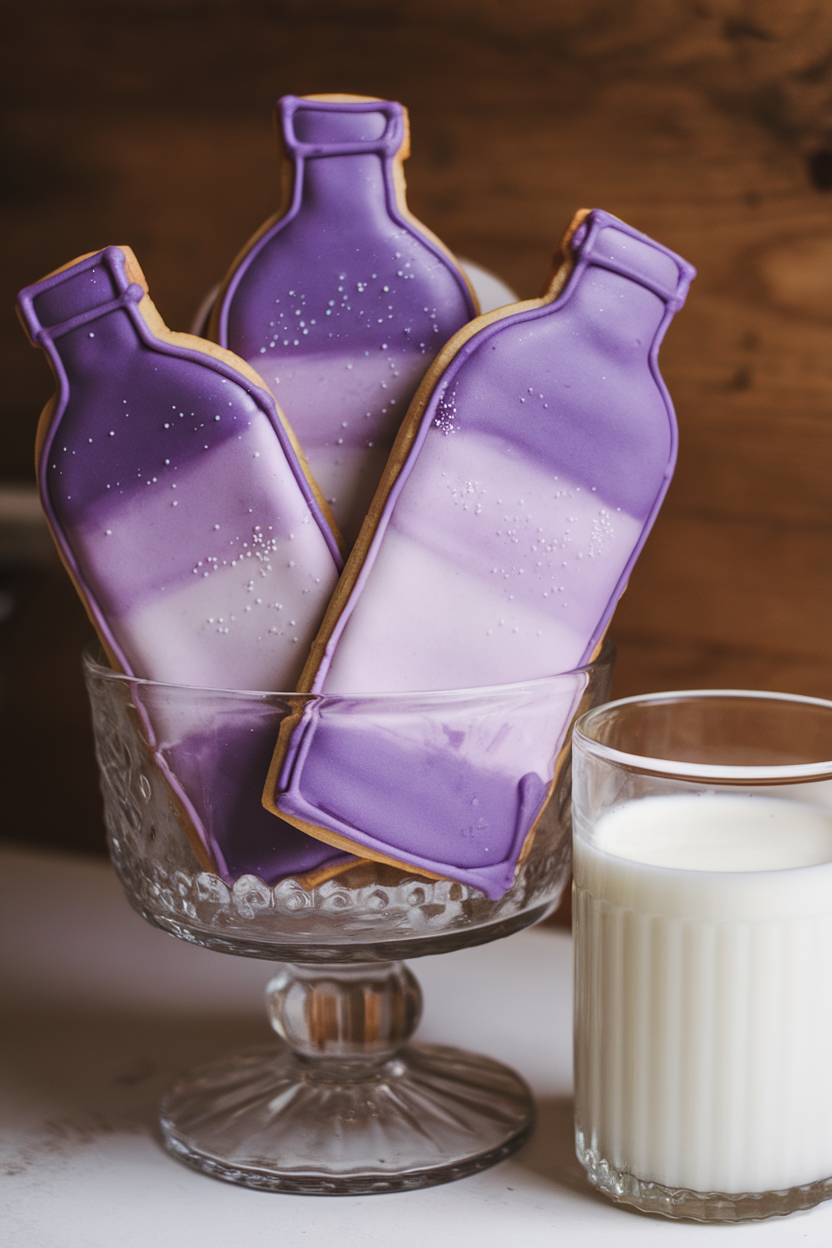
Outline a classic potion bottle, leaving a narrow neck. Create an ombré by blending dark and light purple while the icing is still wet. Dot tiny white stars for a mystical vibe that looks like bottled moonlight.
16. Skeleton Bones Sticks
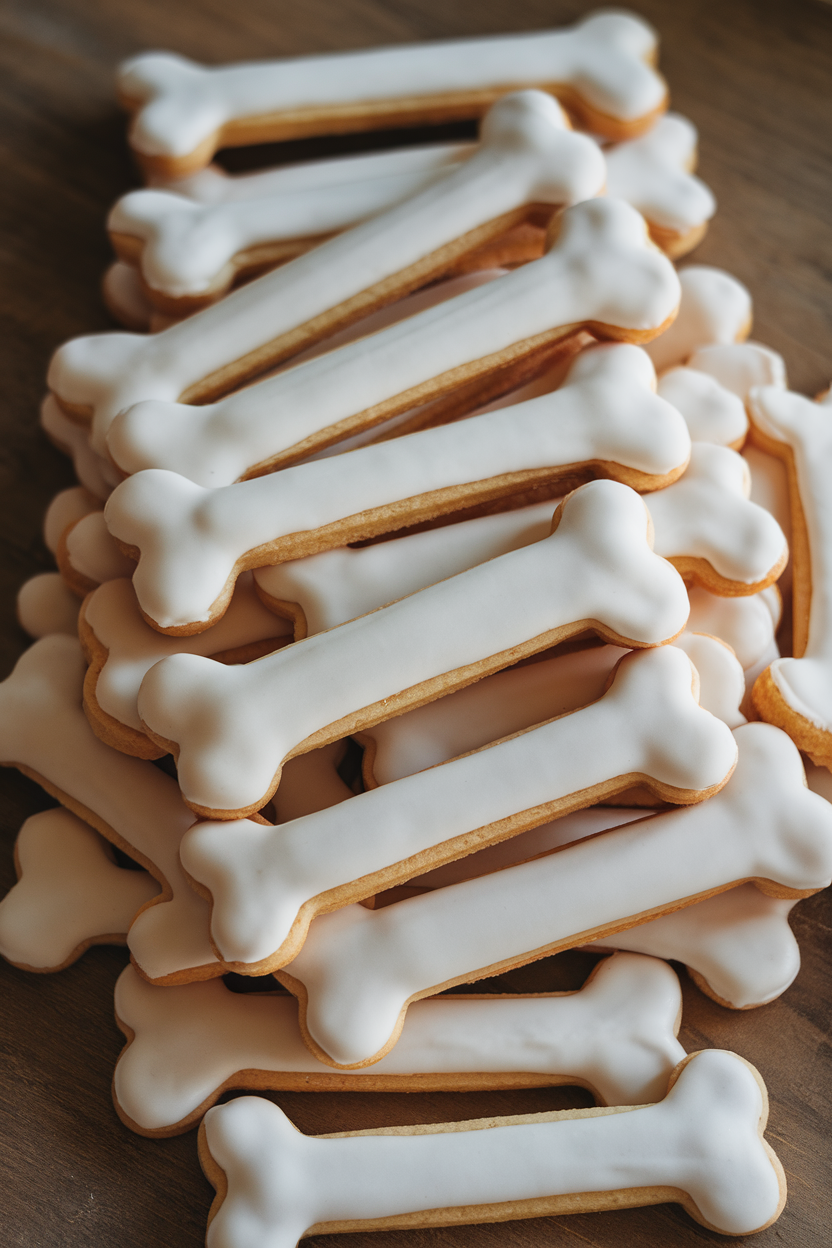
A simple bone cutter or hand-cut template produces these gnarly treats. Smooth white icing gives a bleached-bone effect once dry. Serve the pile on dark cloth for maximum contrast at the snack table.
17. Harvest Moon Rounds
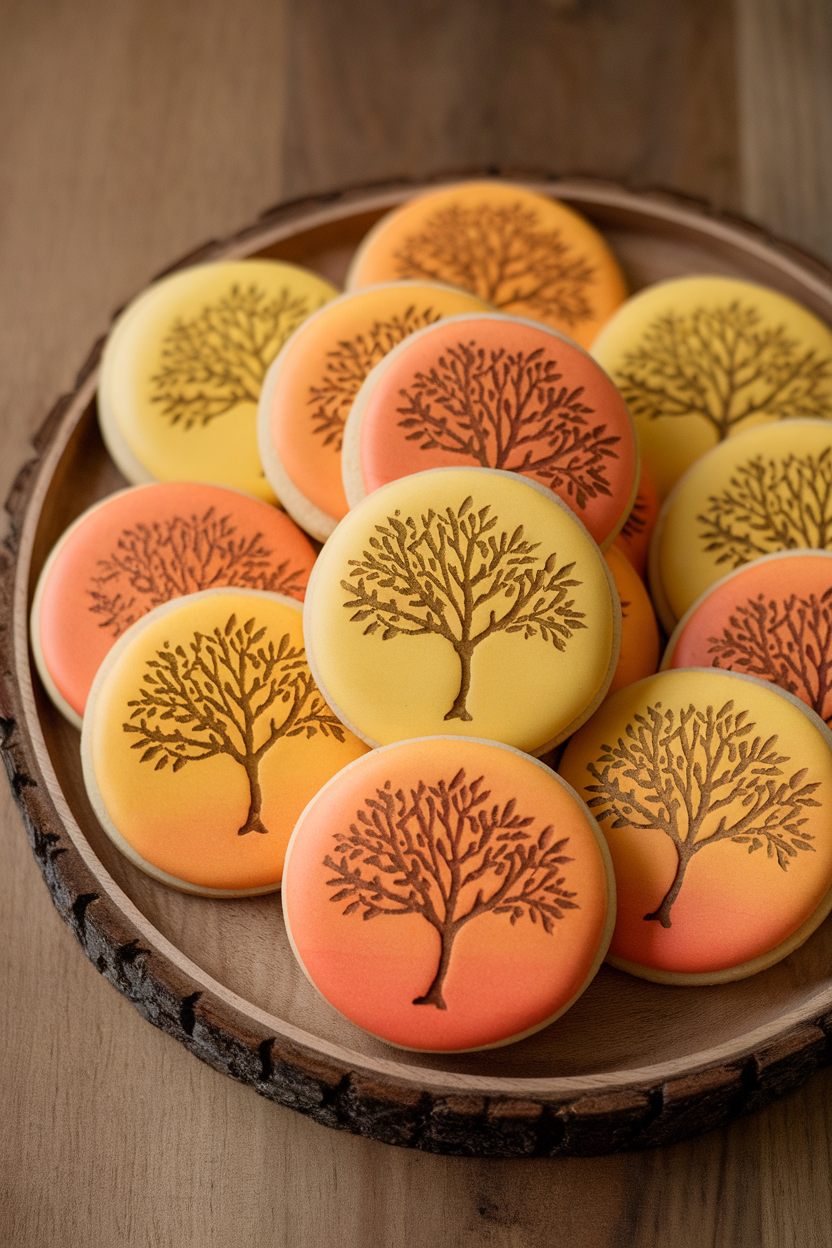
Blend yellow and orange icing in a wet-on-wet swirl to mimic a glowing moon. While still wet, drag a scribe tool dipped in brown icing to create a thin branch silhouette. A tiny edible gold dust finish makes each moonlit scene shimmer.
18. Creepy Coffin Sandwich Cookies
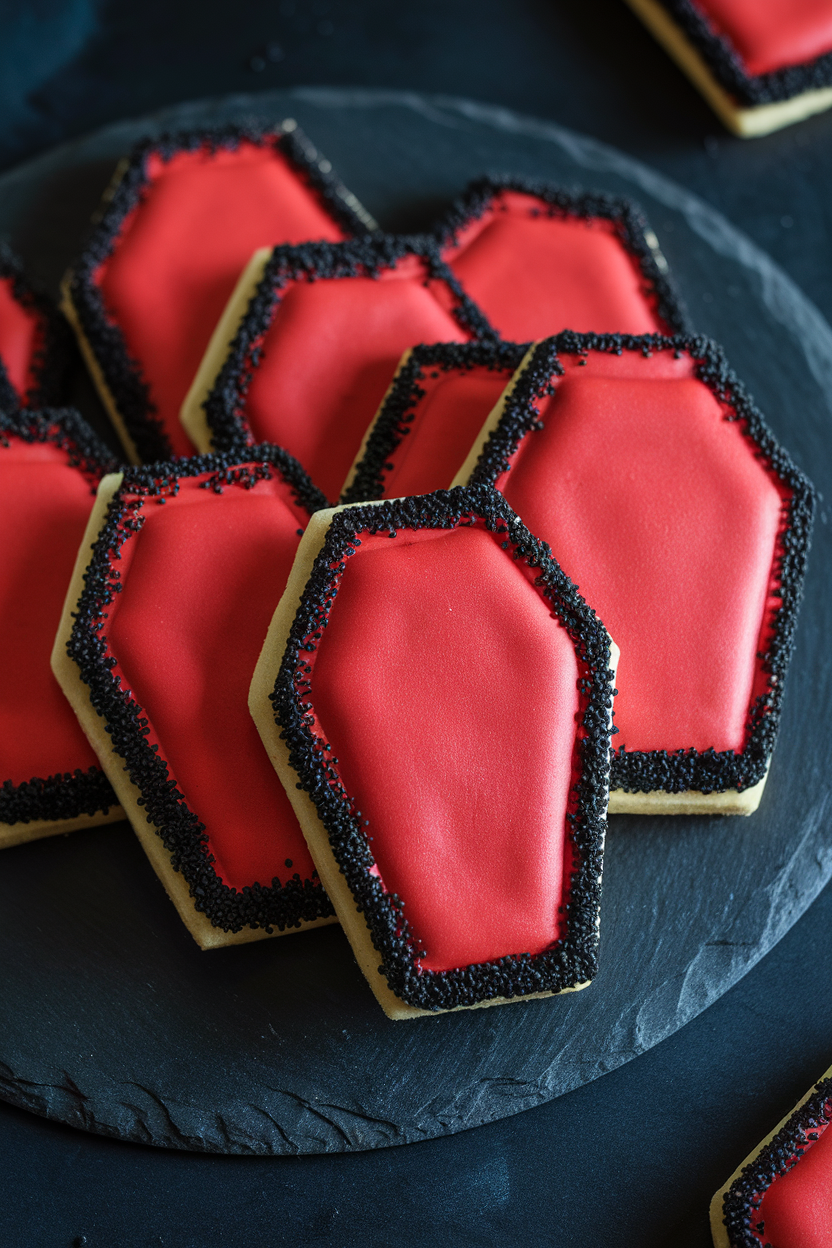
Bake two thin coffin cookies per sandwich, then pipe crimson buttercream inside. A quick roll through black sugar seals the edges and adds crunch. Bite into one and watch “blood” peek out, delighting horror fans.
19. Autumn Leaf Marbled Cookies
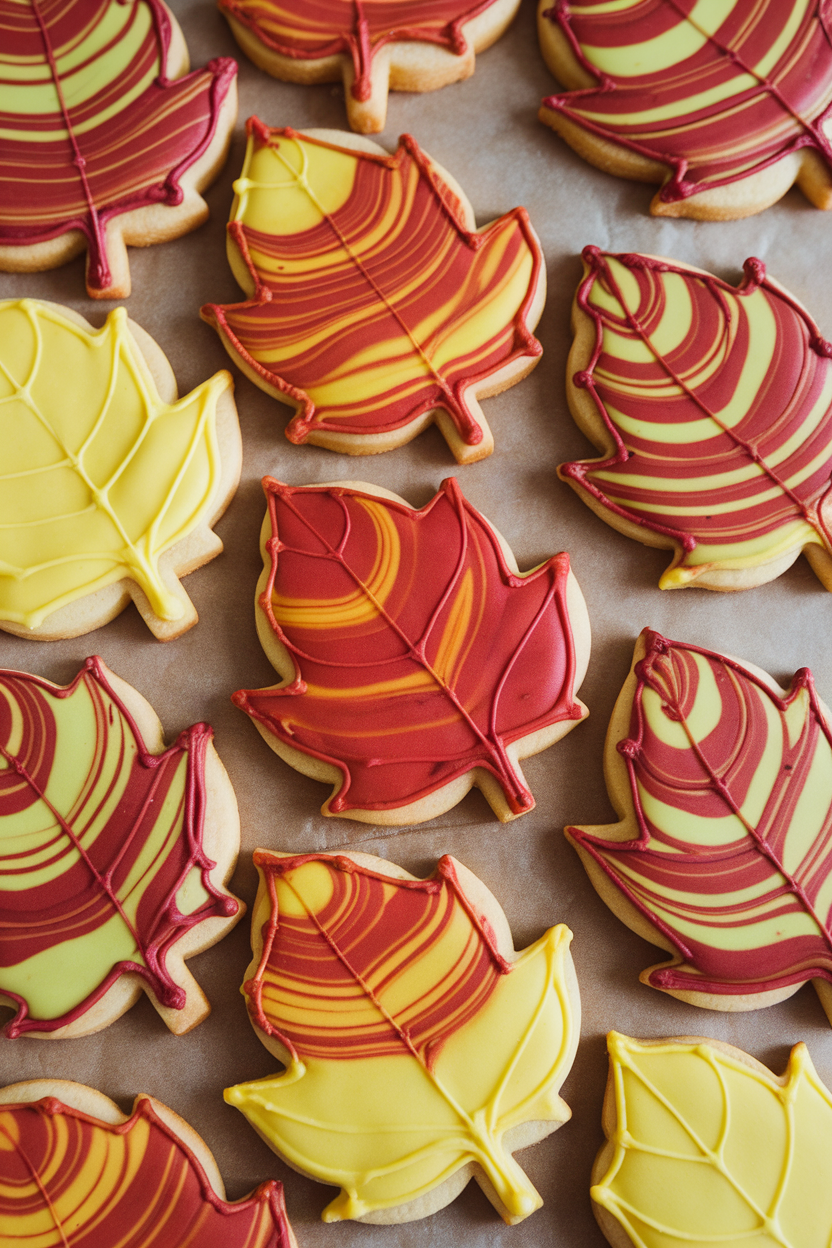
Pipe alternating lines of fall colors, then drag a toothpick through to marble. No two leaves look alike, mirroring nature’s own variety. A sprinkle of edible glitter gives the impression of morning frost.
20. Poison Apple Bites
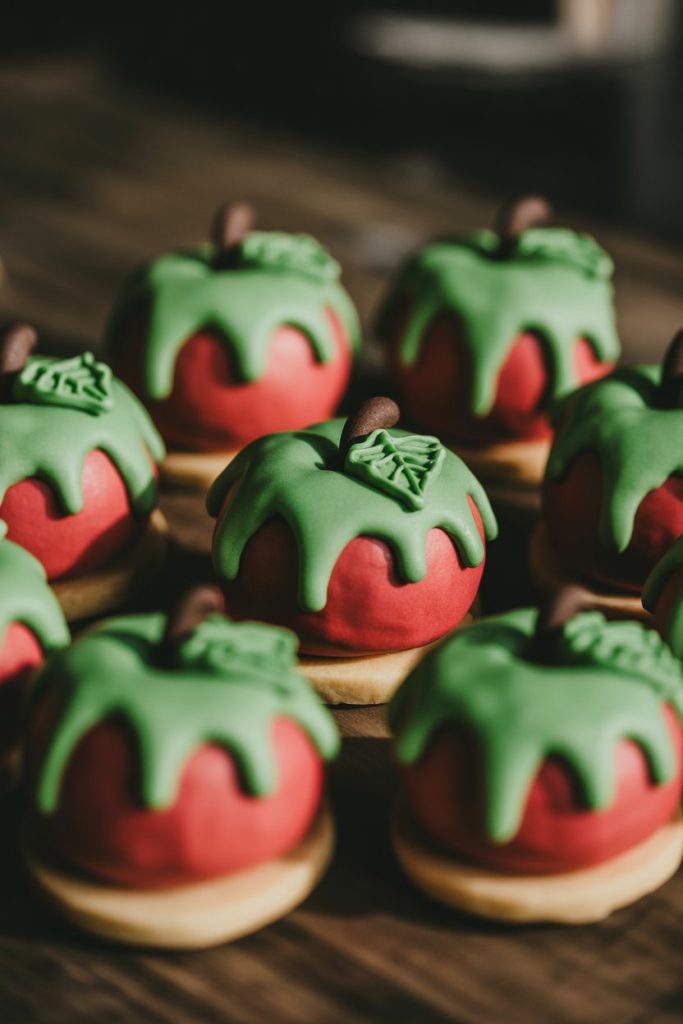
Red icing provides the apple skin, while bright green is dripped from the top to look menacing. Add a brown icing stem and tiny leaf for realism. These make great Snow White-themed party favors.
21. Graveyard Tombstones
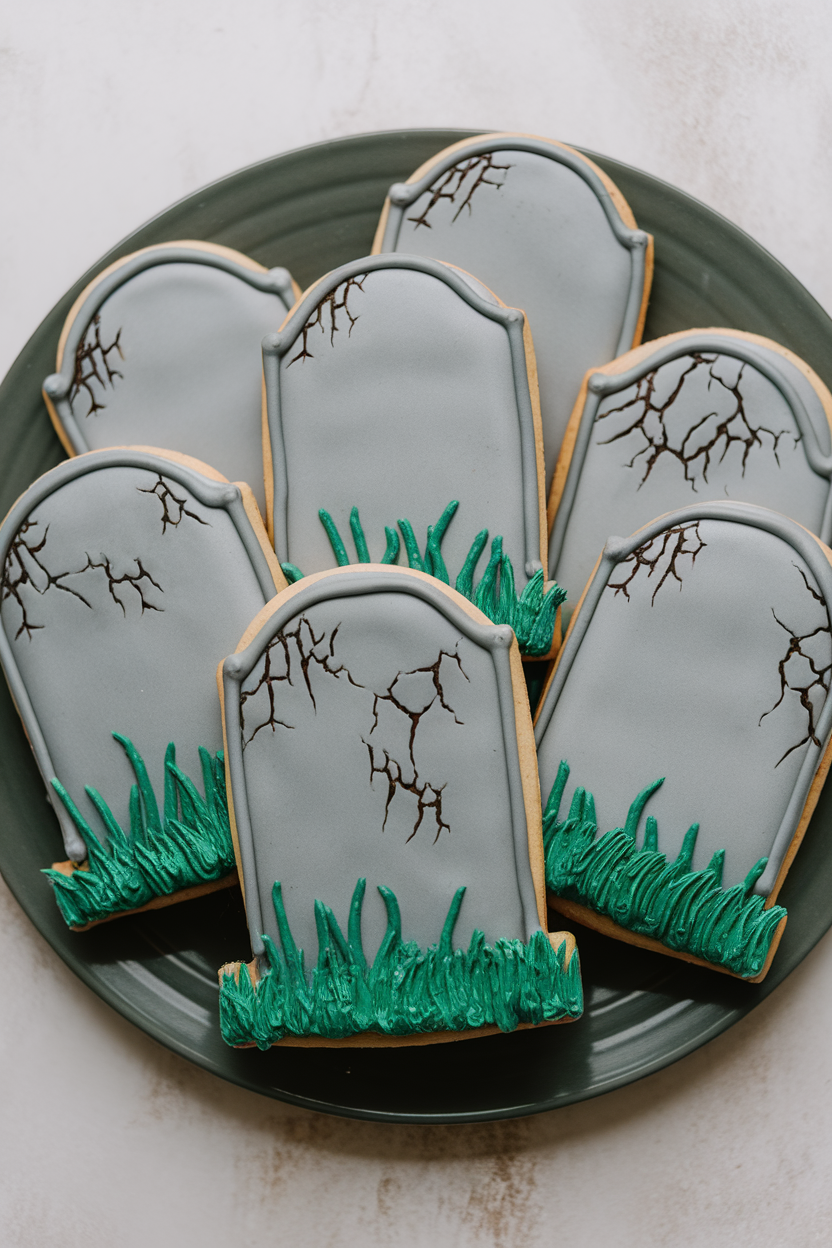
Use a rounded tombstone cutter, flood with gray, and let dry. Add darker gray vein lines and a smudge of black petal dust for weathering. Piped green “grass” at the base finishes the mini cemetery.
22. Friendly Vampire Fangs
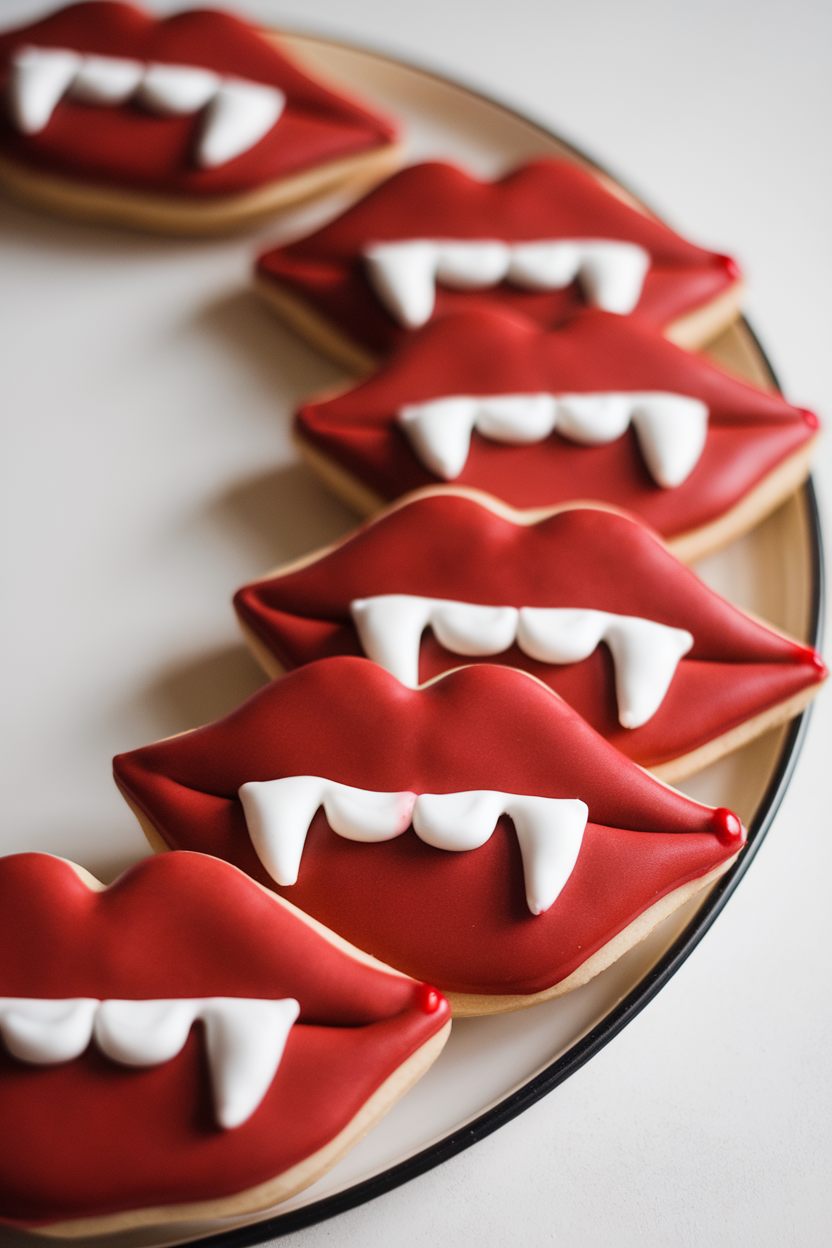
Outline lips in red, flood, and allow to crust. Pipe two white fangs that curve slightly inward for a cartoon vibe. A dot of thinned red icing adds a playful drop of “blood.”
23. Scaredy-Cat Paw Prints
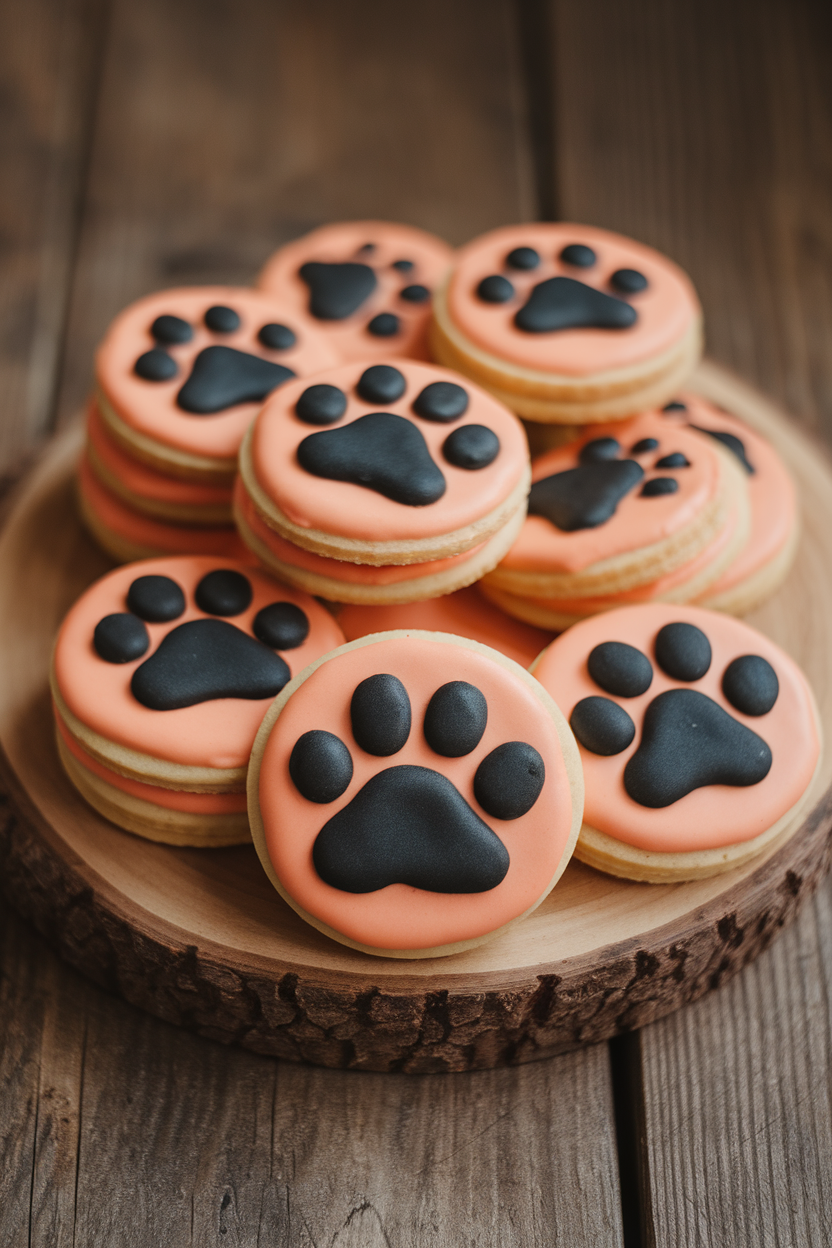
A small round cutter keeps these simple. Flood in orange and pipe a central black pad with four dots for toes. Paw-print cookies work well as filler on larger platters of cat or pumpkin shapes.
24. Spooky Owl Eyes
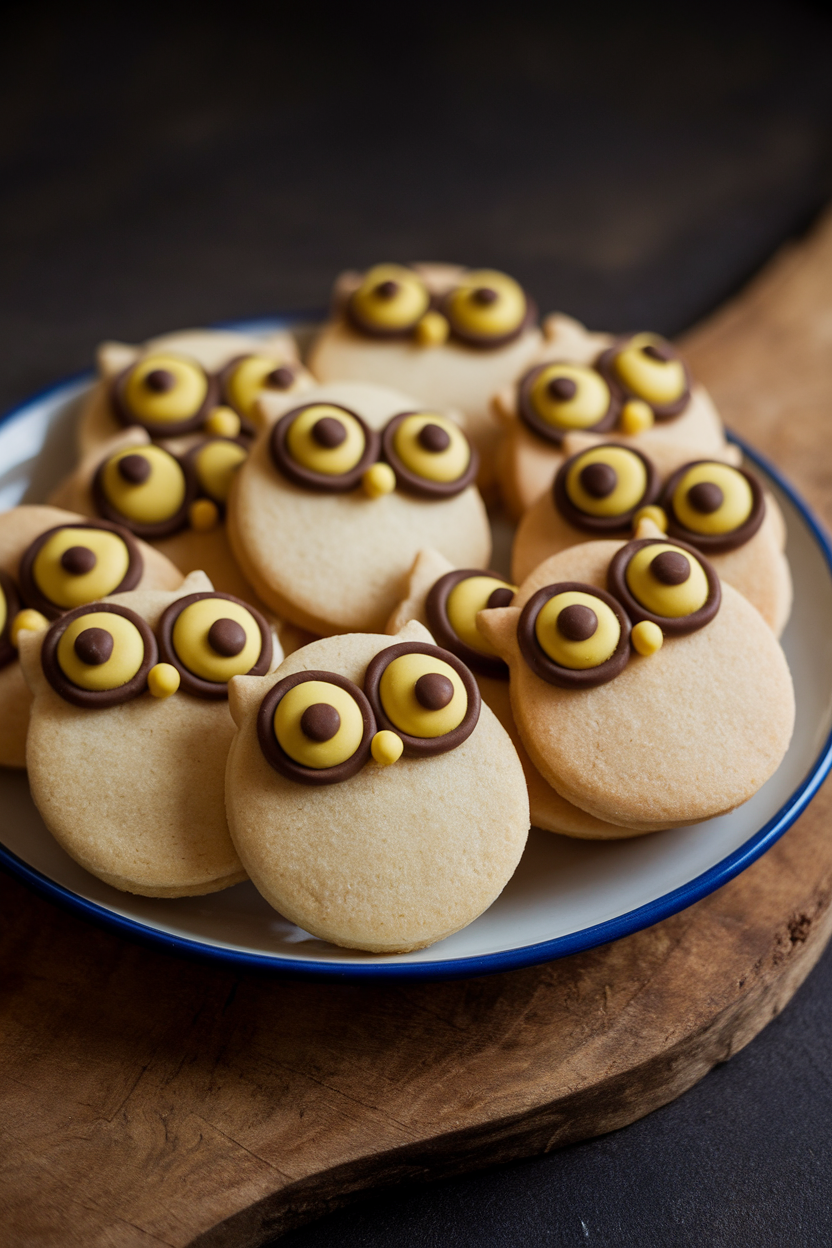
Flood the entire cookie in black, then pipe two large yellow circles. Once those set, add smaller black pupils and half-moon chocolate lids. The intense stare looks terrific on a midnight snack plate.
25. Crystal Ball Glaze Cookies
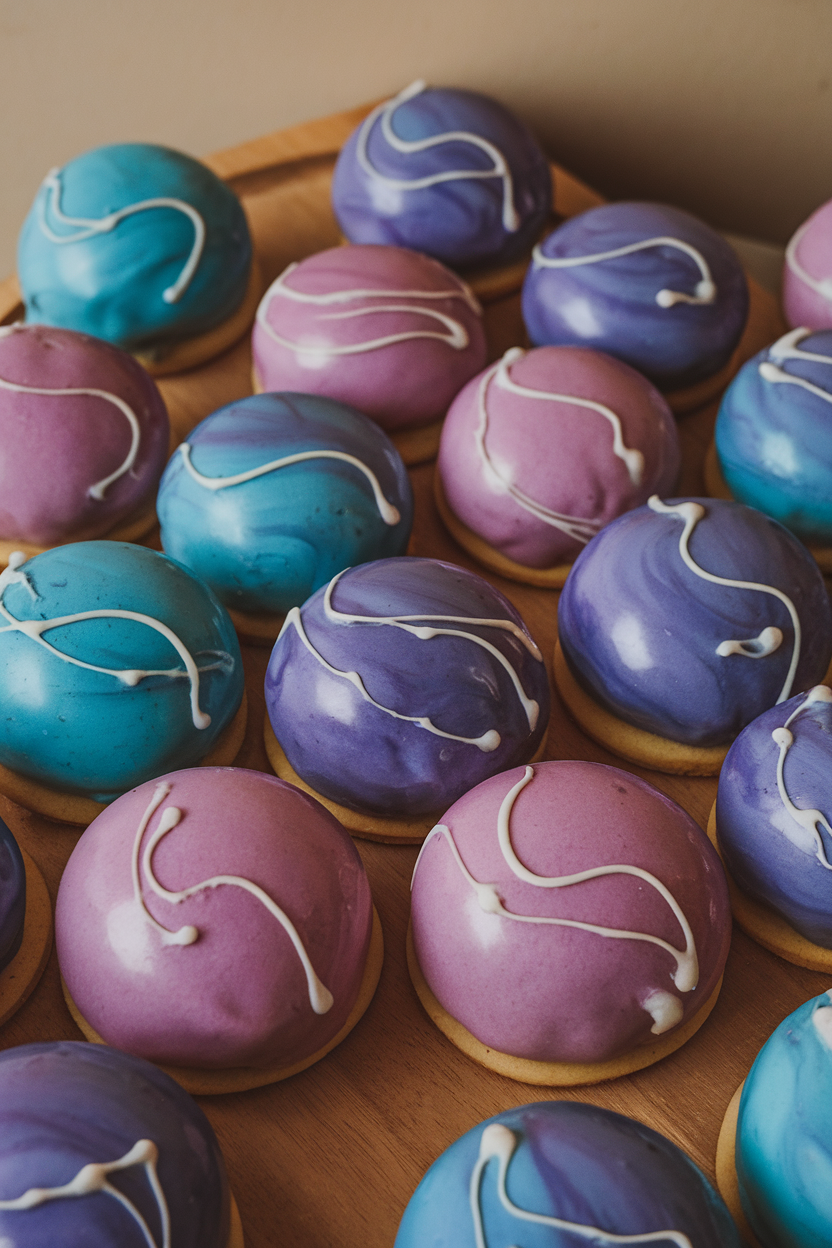
Dip each cookie into marbled glaze made from tinted corn-syrup icing. The shiny surface hardens with a glossy finish that catches candlelight. Edible silver stars sprinkled on top hint at swirling magic inside.
26. Candy Bucket Minis
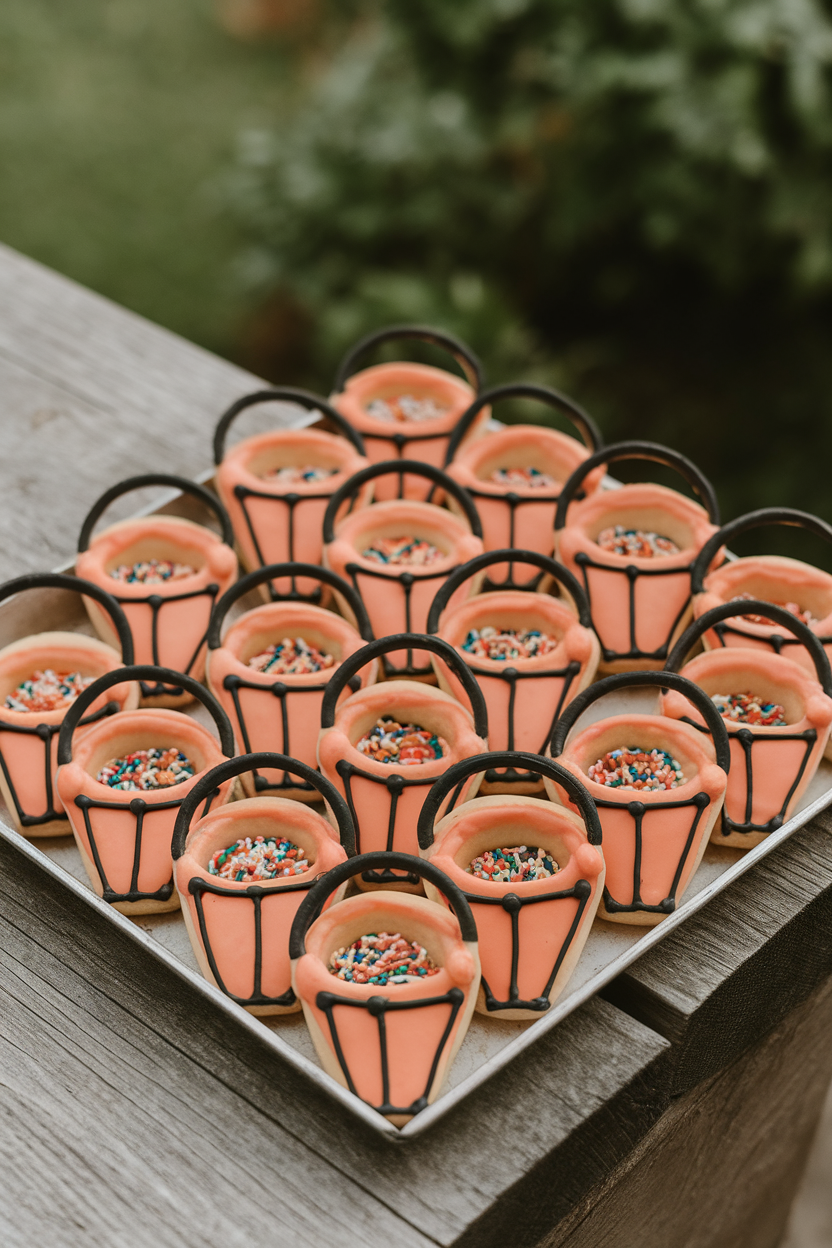
Use a small pail or cauldron cutter; flood orange and pipe a curved black handle. While icing is wet, stick on colorful jimmies to mimic mixed sweets. These tiny cookies disappear fast at school celebrations.
27. Boo Letter Cookies
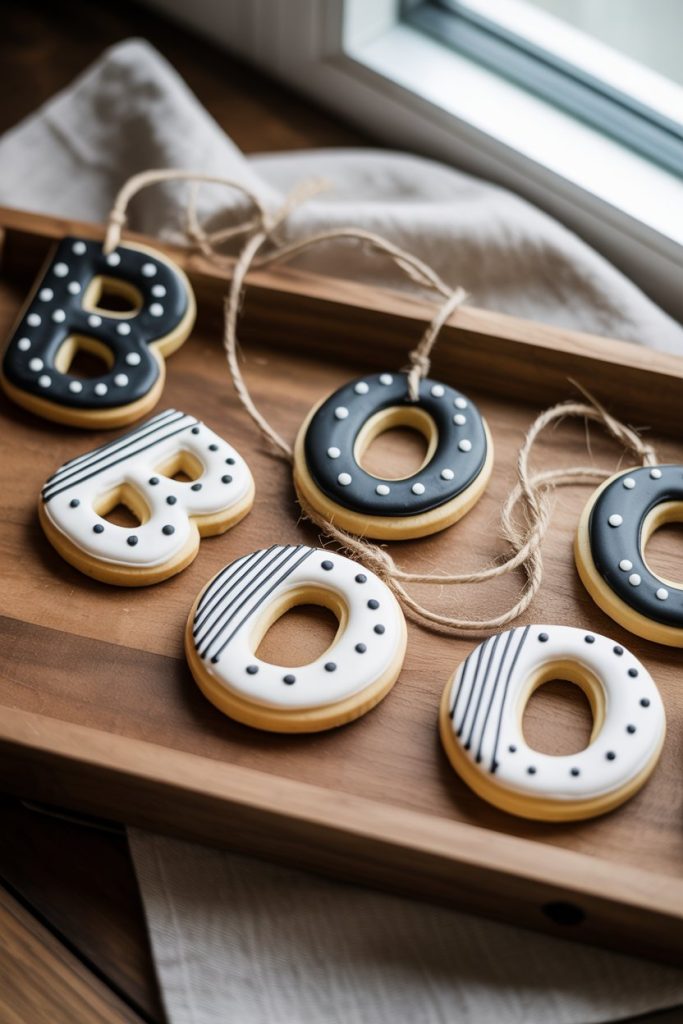
Alphabet cutters spell out the classic greeting in edible form. Alternate colors and add stripes or dots to keep the trio playful. String them on kitchen twine for an edible garland just before serving.
28. Tiny Trick-or-Treat Bags
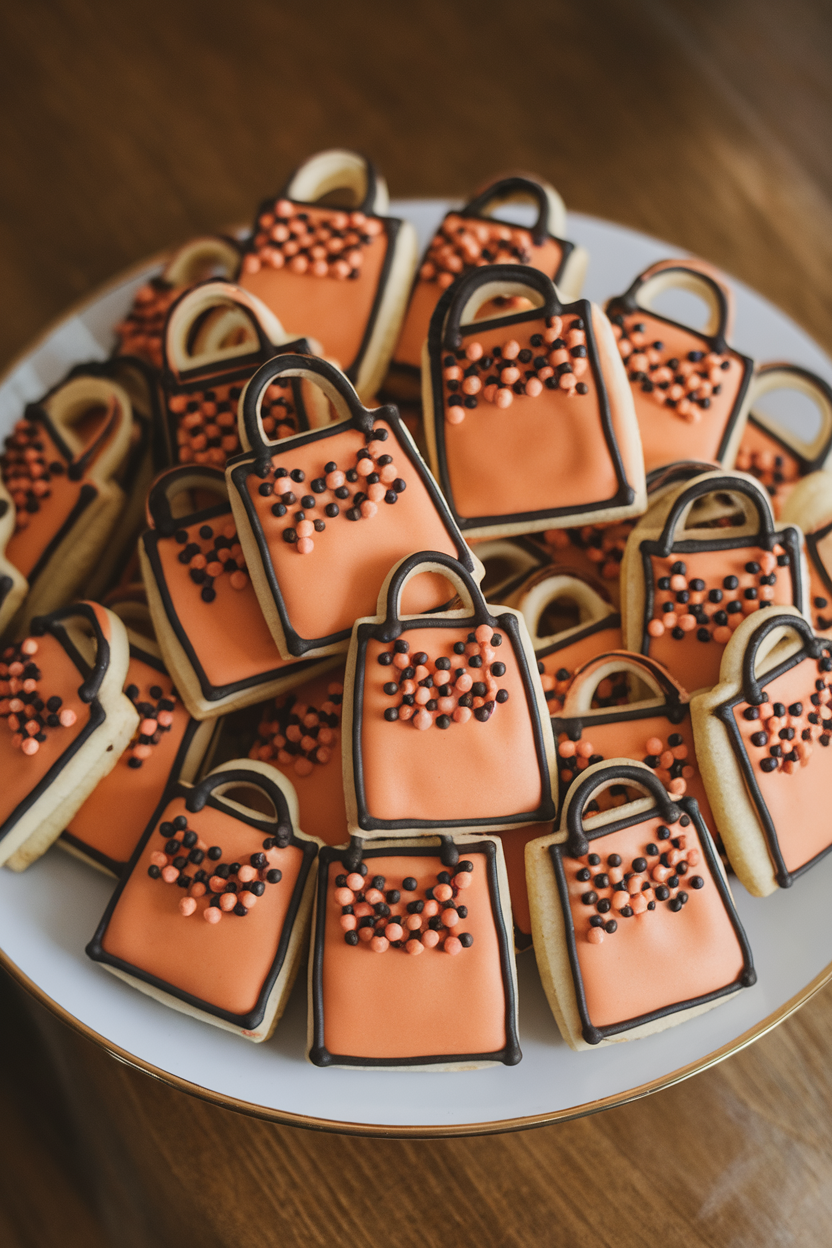
Square shapes with a notch at the top resemble paper bags. Flood orange, add black handles, and gently press in micro mini candies before icing sets. Presentation tip: serve in actual mini treat pails for flair.
29. Moon & Stars Night Sky
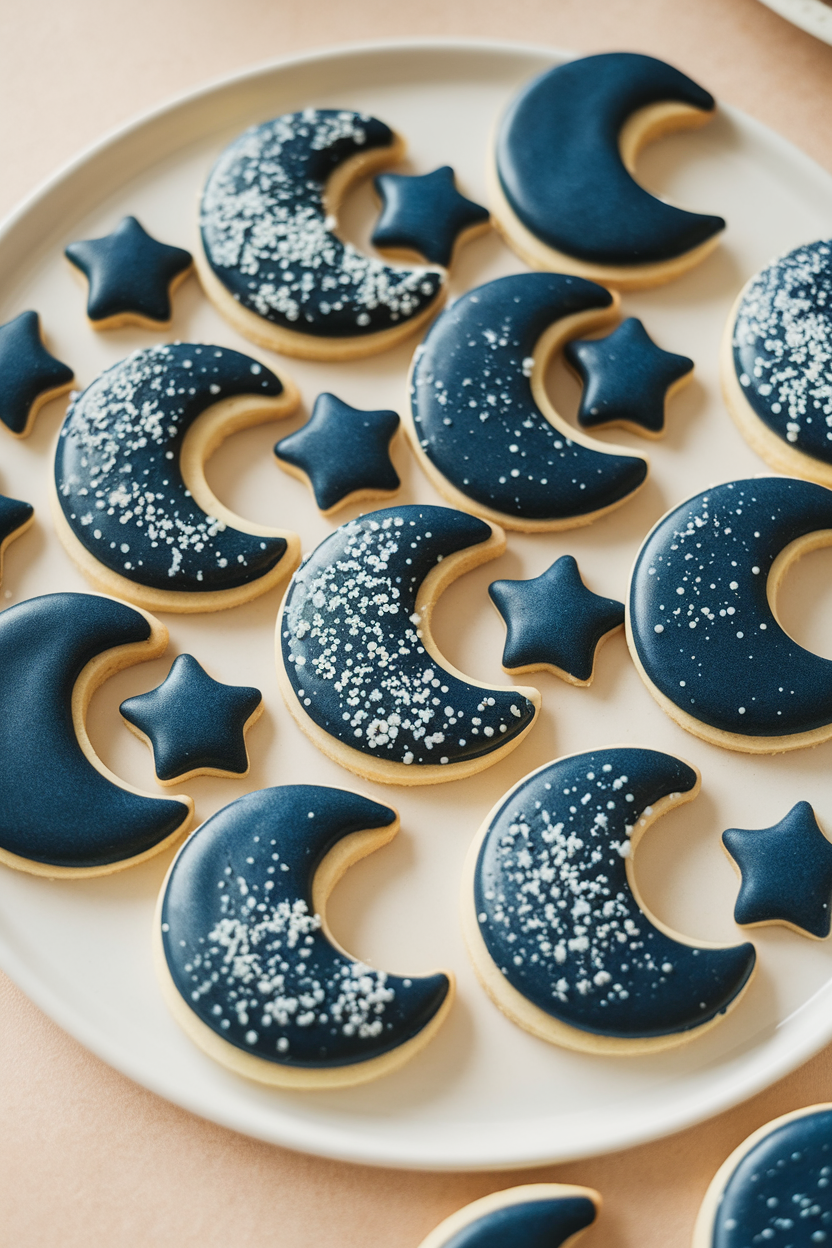
Tint dough a dark blue to skip base icing if you prefer. Cut crescents and small stars, bake, then coat with a thin layer of royal icing for sheen. White nonpareils form a galaxy in minutes.
30. Giggling Goblin Faces
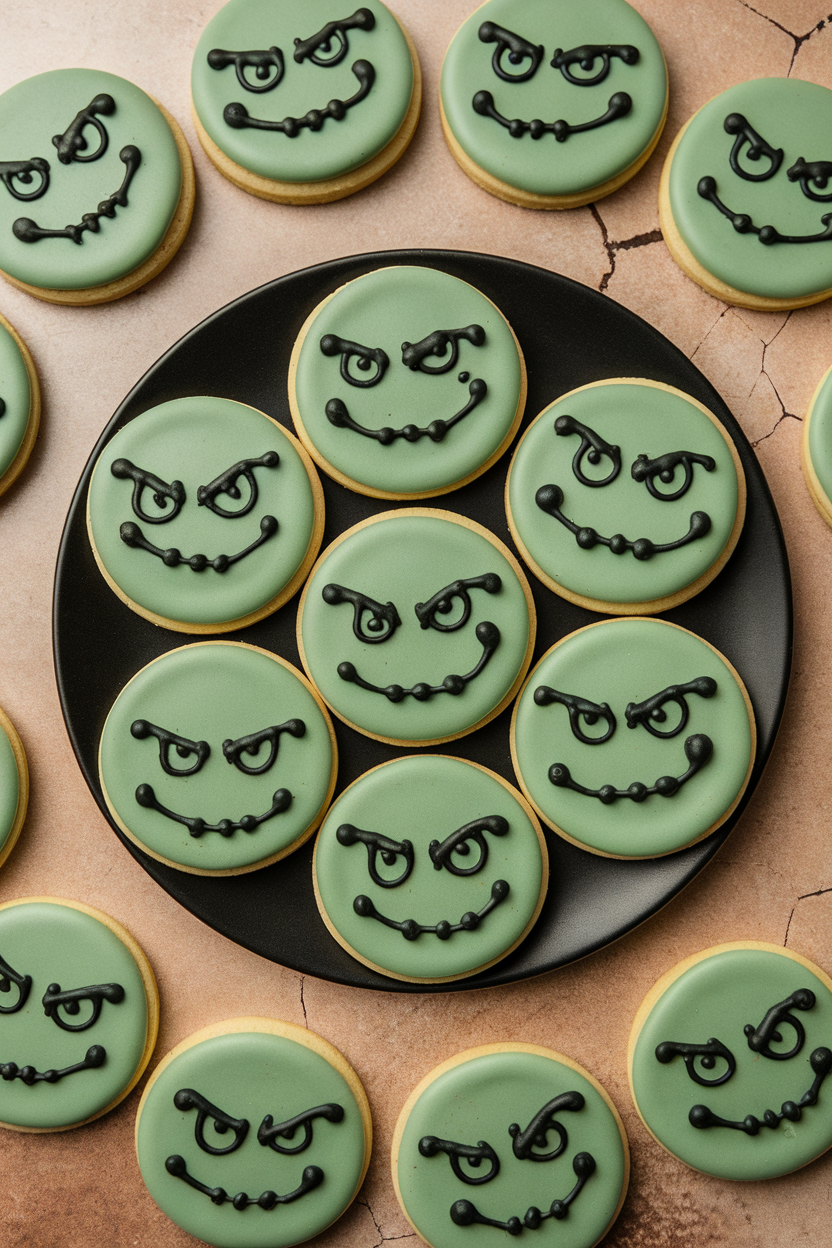
Green flood icing sets the tone; black lines sketch crooked grins and raised eyebrows. A single yellow tooth made from a sprinkle adds humor. Kids enjoy inventing unique expressions on each cookie.
31. Rustic Hay Bale Squares
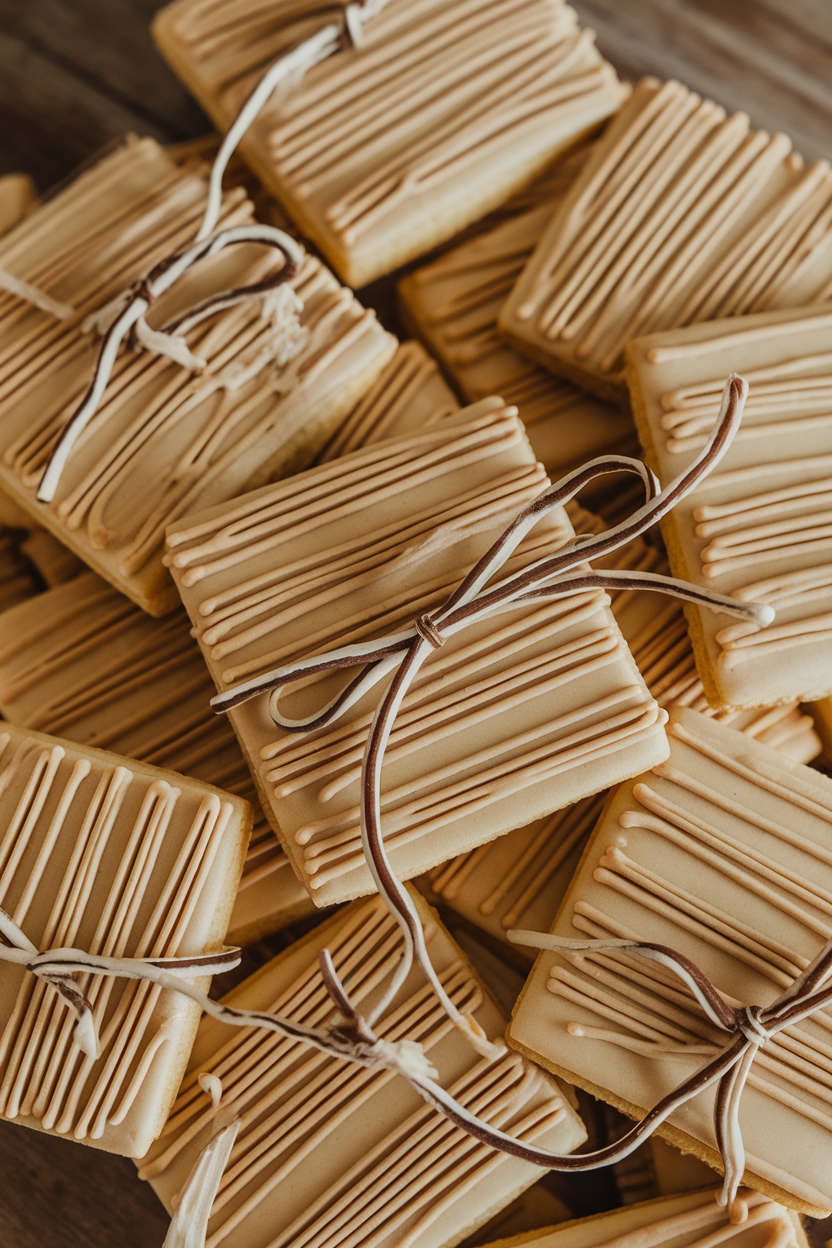
Drag a fork through partially set icing to achieve straw-like ridges. A narrow band of chocolate icing forms twine around the edges. These pair nicely with scarecrow or farm-themed food displays.
32. Bewitched Broomsticks
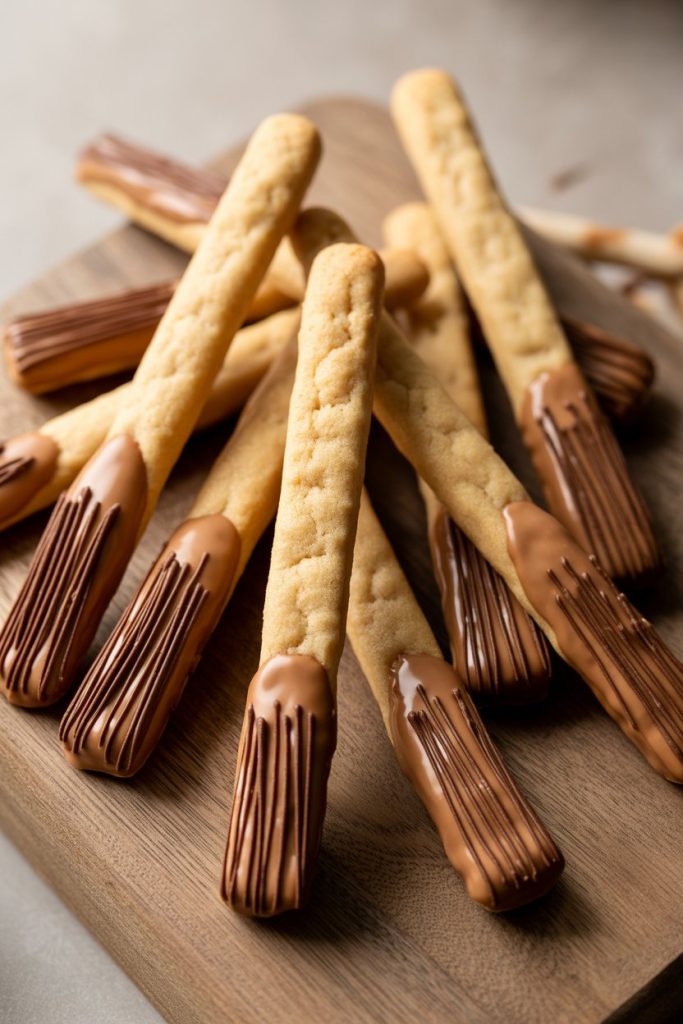
Shape dough into slim rectangles, bake, and dip the bottom half in caramel-colored icing. Pipe thin lines upward to mimic straw bristles. A dark chocolate handle balances sweetness and adds color contrast.
33. Mini Monster Mash Faces
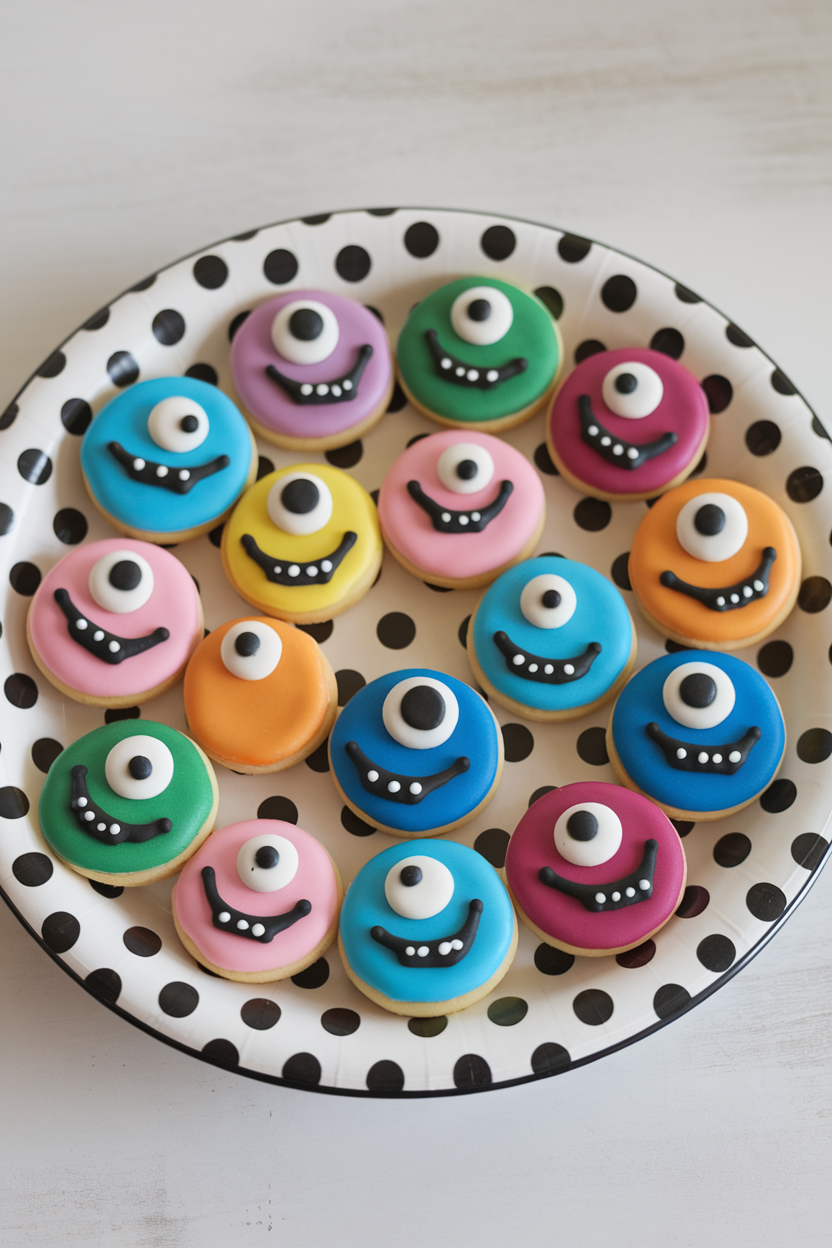
Divide icing into five bright hues, then flood batches quickly. Candy eyes of varying sizes create immediate personality. Pipe zigzag mouths or stuck-out tongues to ramp up silliness.
34. Pumpkin Patch Plaques
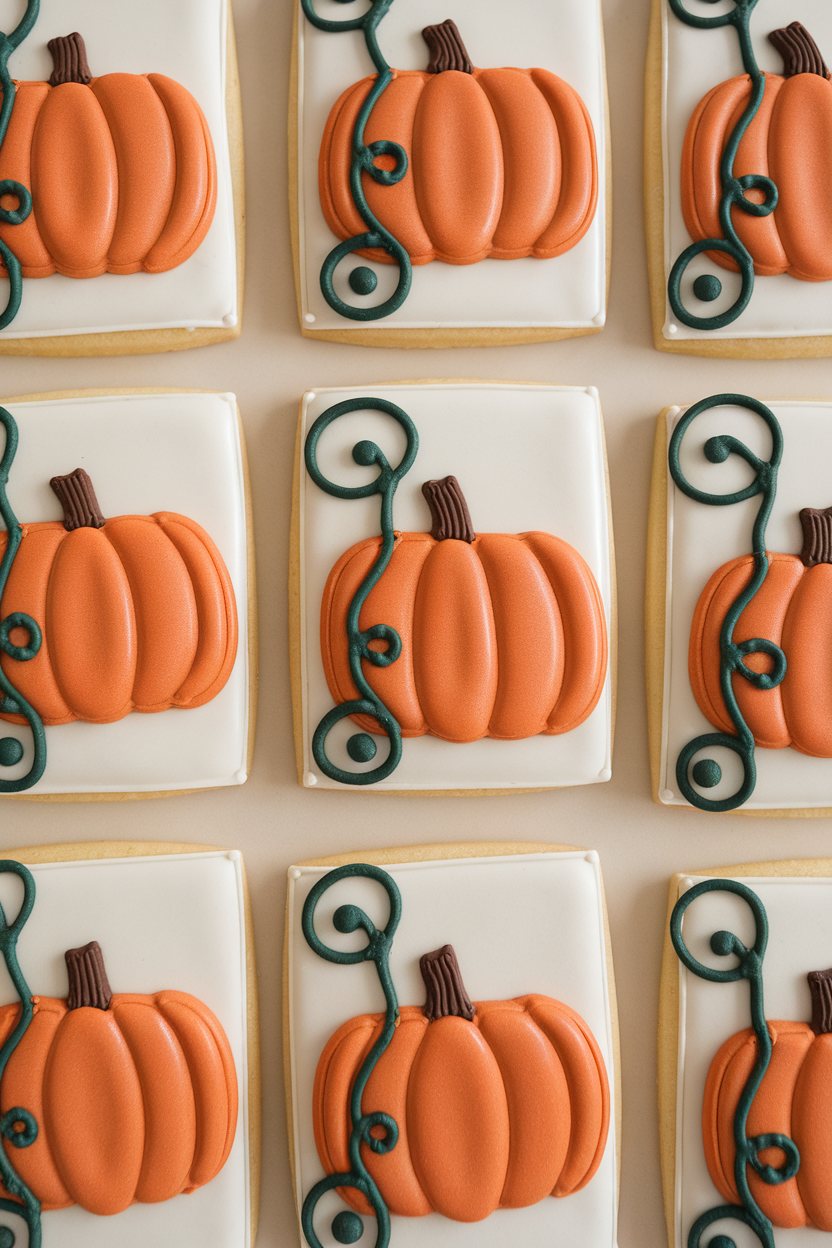
Flood a pastel base, let dry, then paint a pumpkin scene using diluted gel colors and a food-safe brush. Royal-icing vines add dimensional curls. Plaque cookies look upscale wrapped in clear cello bags for hostess gifts.
35. Creepy Crawly Centipedes
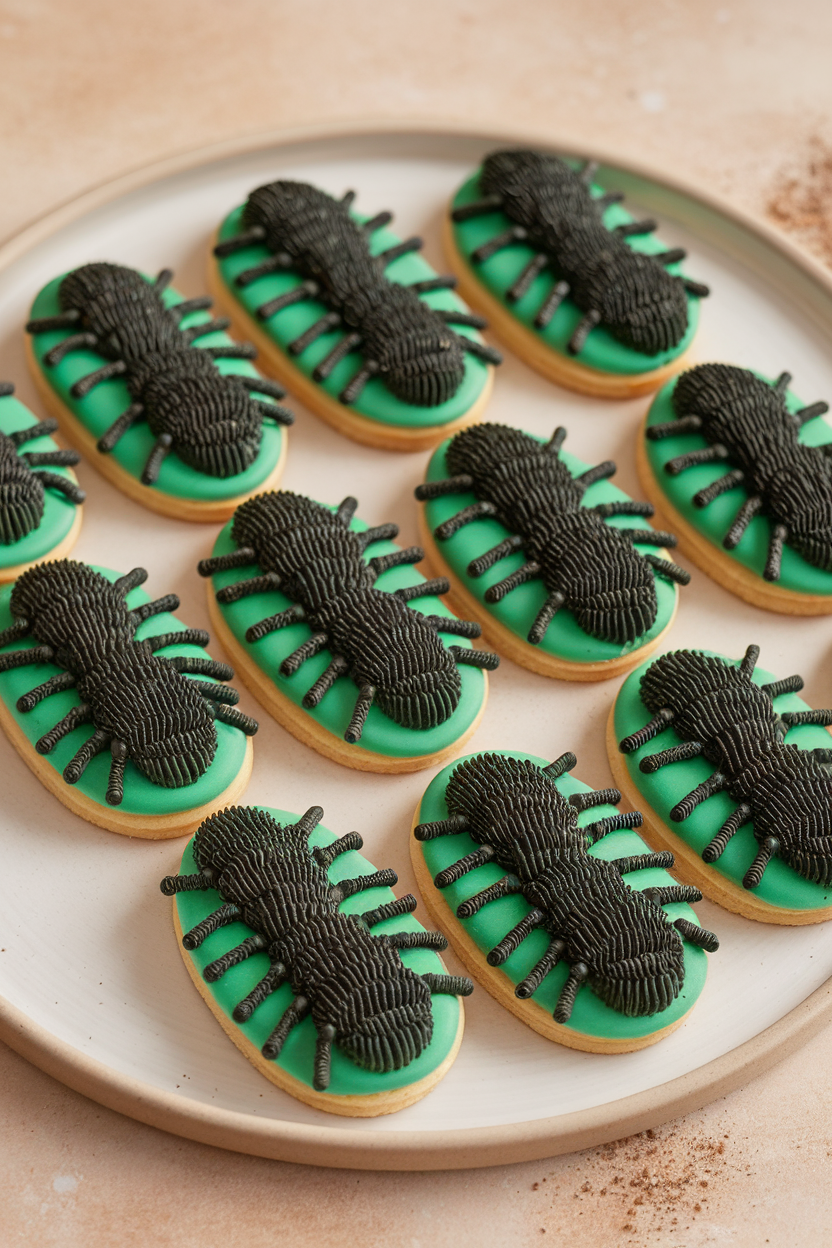
Pipe green flood icing, then press black jimmies into the sides before it fully sets to act as legs. Add two larger candy eyes at one end. Crunchy legs give a fun texture contrast when you take a bite.
36. Caramel Apple Slices
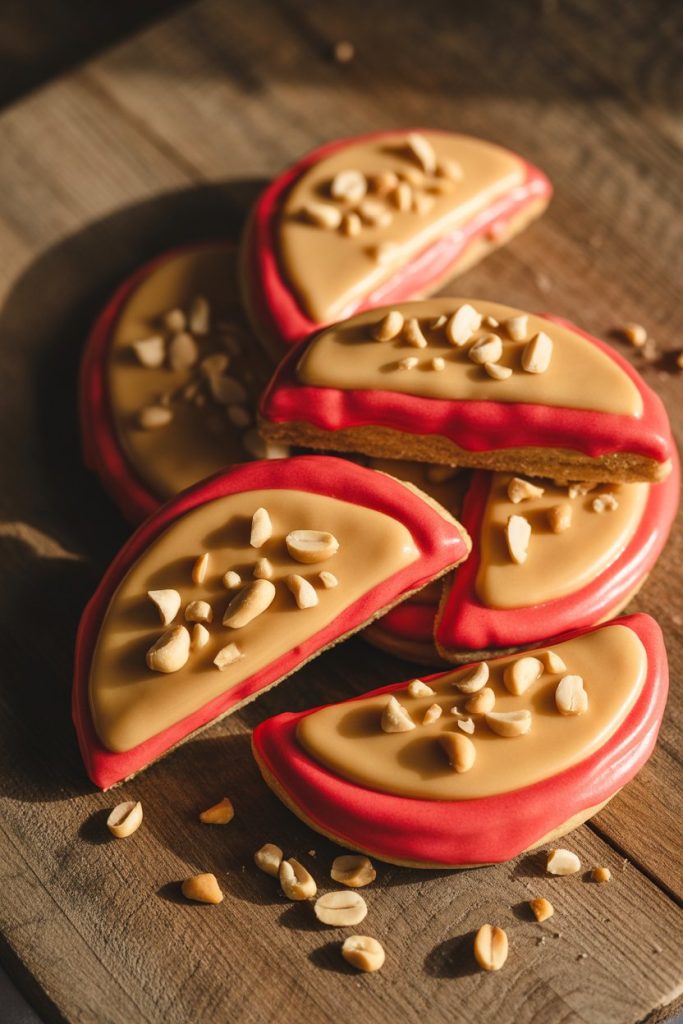
Use a round cutter, then slice each circle in half before baking. Red icing covers the “skin” while soft caramel icing coats the flat edge. Chopped peanuts pressed into the caramel deliver authentic county-fair vibes.
37. Haunted Clock Faces
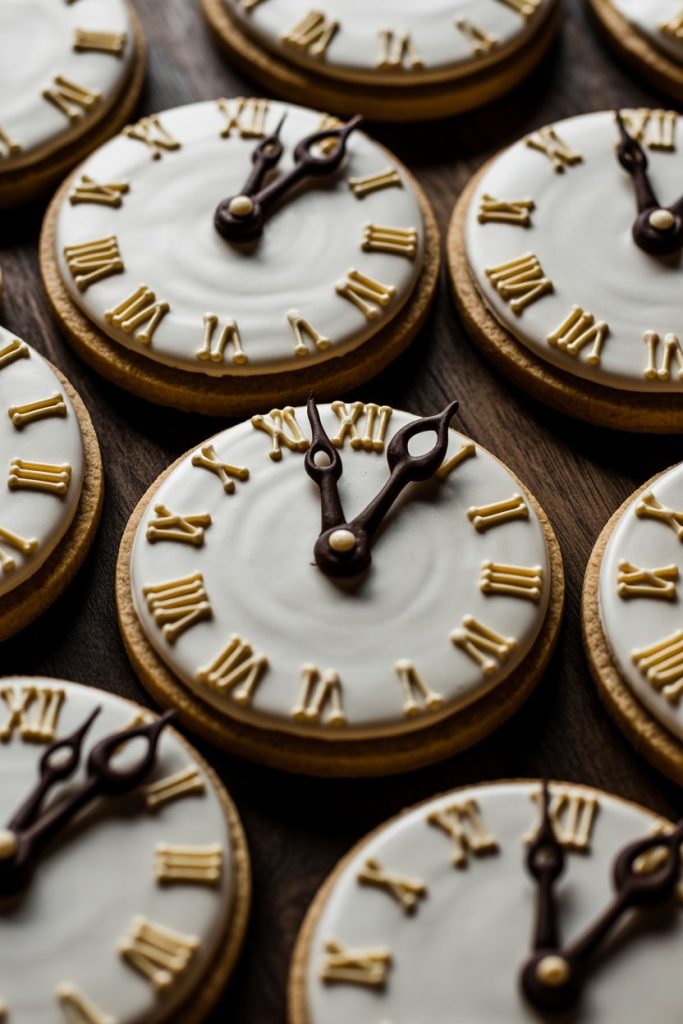
Pale background icing lends an antique feel; edible marker writes numerals with ease. Black royal icing hands freeze the clock at 12:00, creating suspense. A dusting of cocoa powder ages the “metal” ever so slightly.
38. Starry Midnight Cats
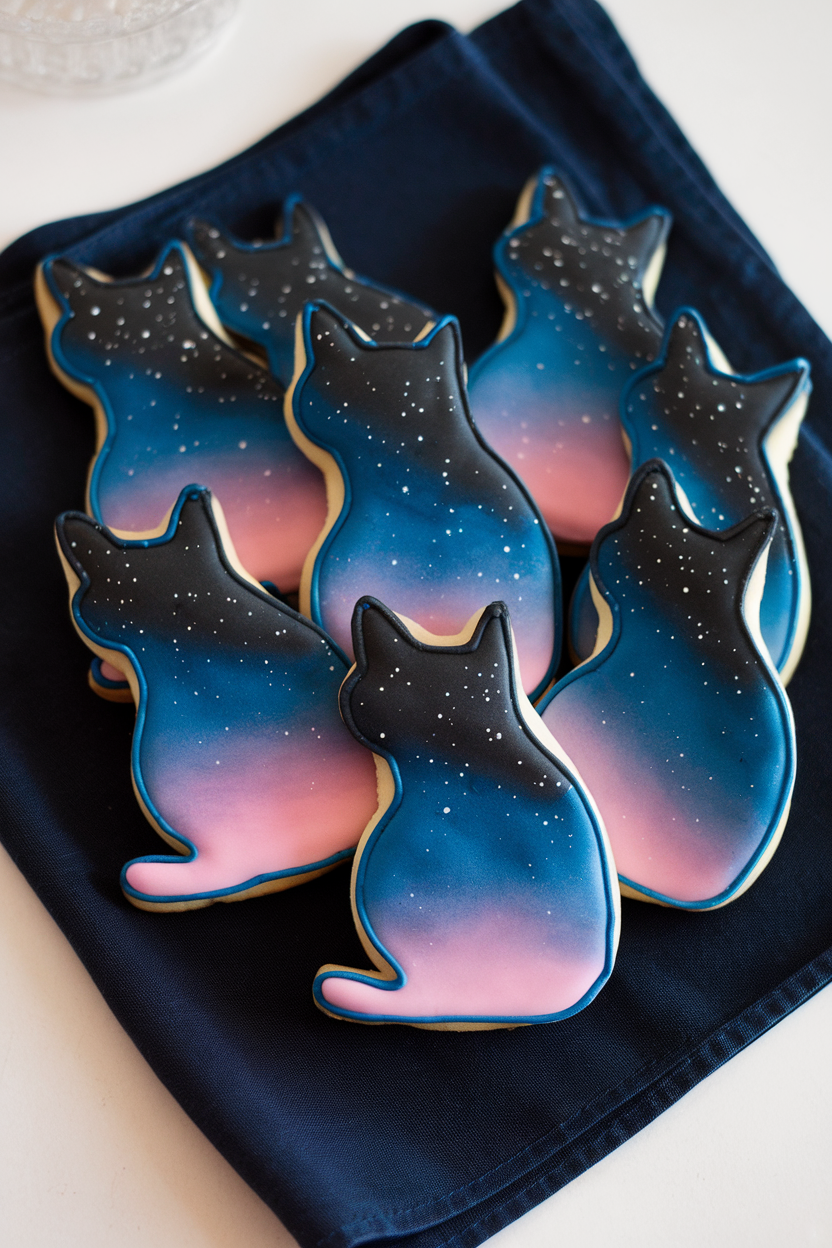
Flood cats in navy, then dab purple and teal icing for a dreamy galaxy effect. Use a toothpick dipped in white to dot stars across the body. These elegant felines sparkle under dining-room lighting.
39. Foggy Graveyard Gates
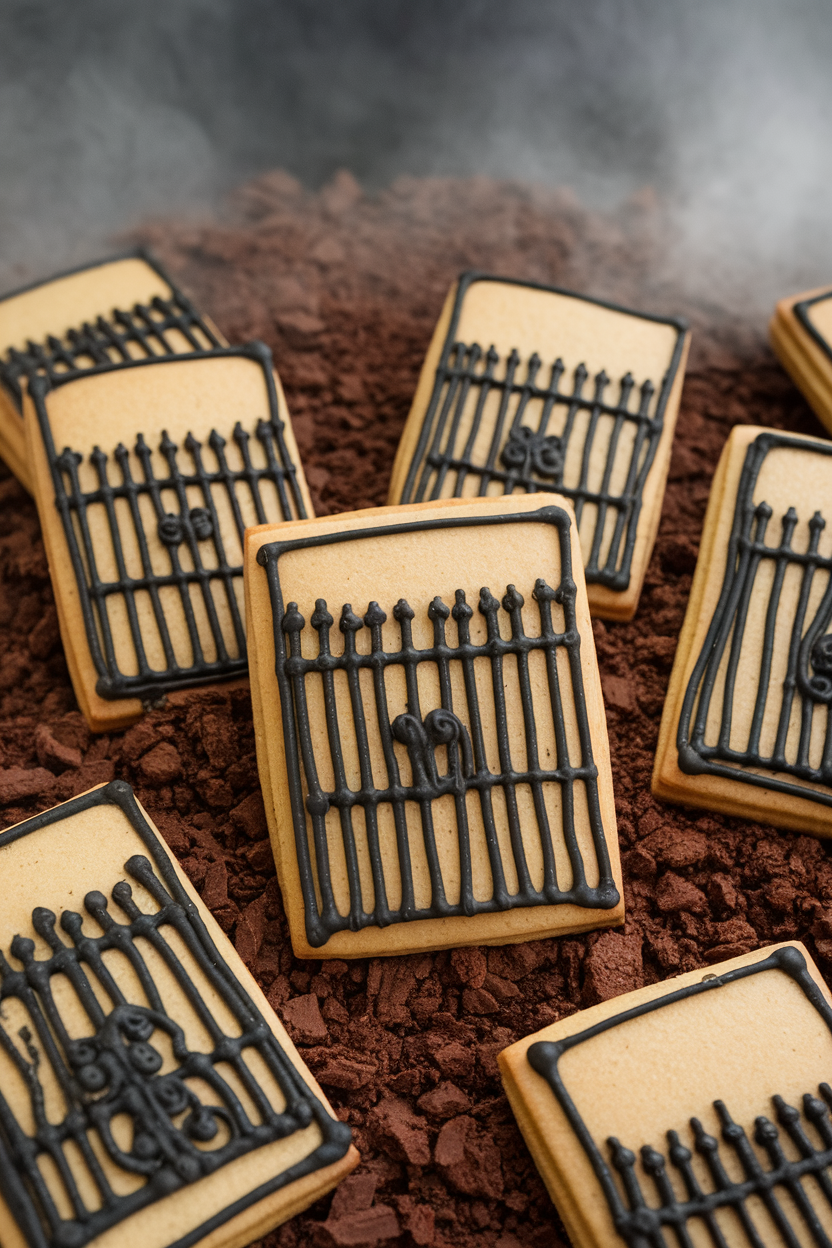
Airbrush or sponge on light gray first, leaving uneven patches for fog. Pipe thin black lines to craft wrought-iron gate shapes. Stand cookies in crushed chocolate wafers for a 3-D scene on your dessert table.
40. Witchy Shoe Buckles

A boot cutter makes the outline; vibrant purple and lime icing channel classic witch attire. Paint edible gold luster dust on the buckle for shine. Pair these with broomstick cookies for a cohesive theme.
41. Harvest Scarecrow Smiles
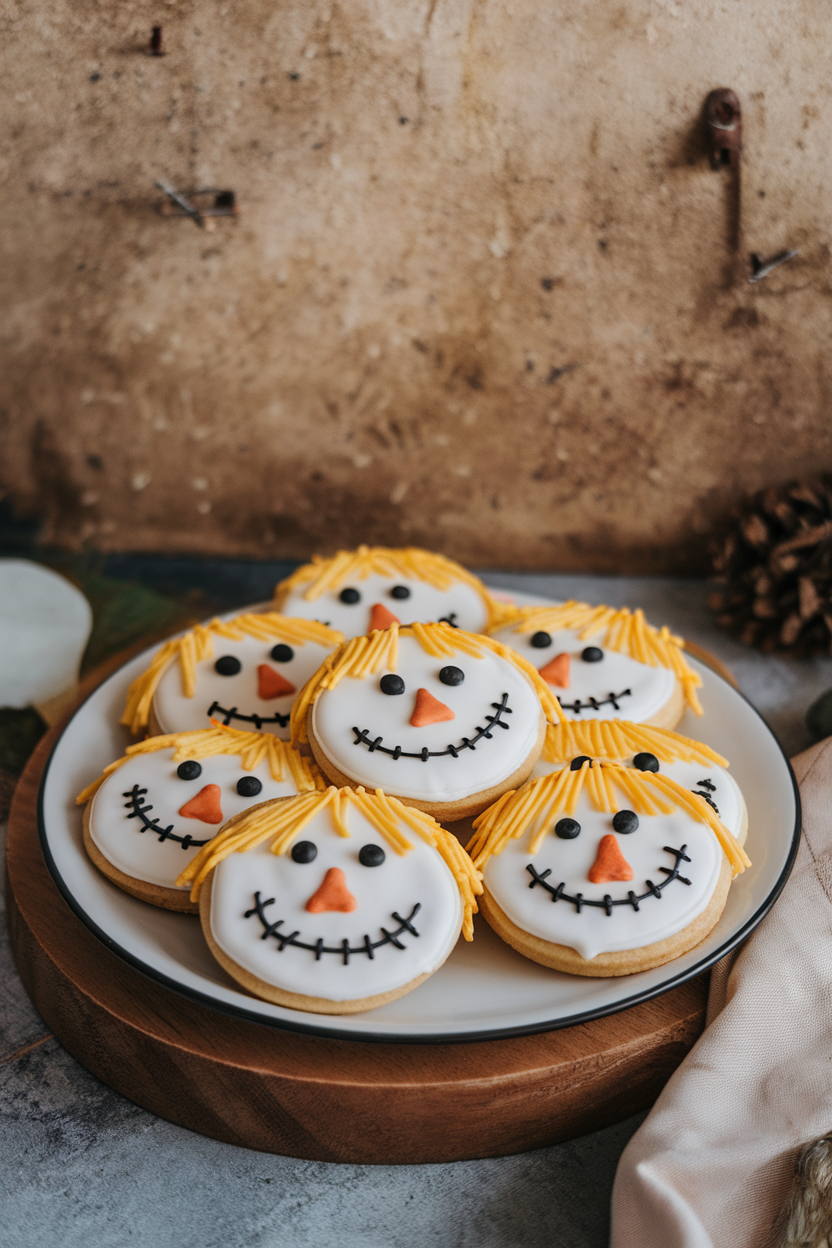
Use tan icing for burlap skin, then pipe X-stitch details around the edges. Attach yellow jimmies at the top for straw peeking out of a piped hat. Orange noses and rosy cheeks bring the friendly scarecrow to life.
42. Eerie Eyeball Spritz
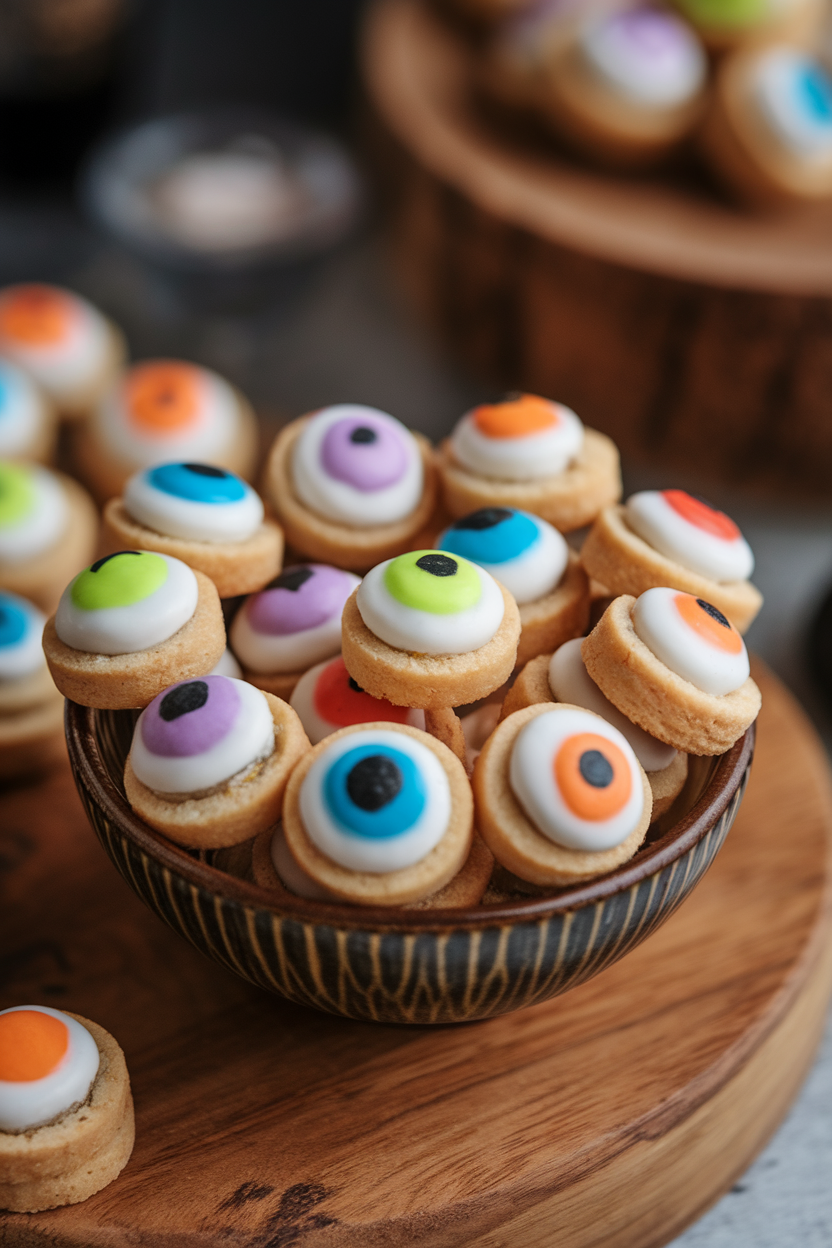
Press red, green, or blue candies into the soft spritz dough before baking. The candies melt slightly to form glossy irises. A fine black icing ring adds pupil detail once cooled.
43. Little Lanterns
Cut a simple lantern silhouette, flood the frame in black, and fill panes with translucent orange icing. Piping gel mixed with food color creates a stained-glass effect. Display these around real votive candles for ambiance.
44. Sugar Maple Spinners
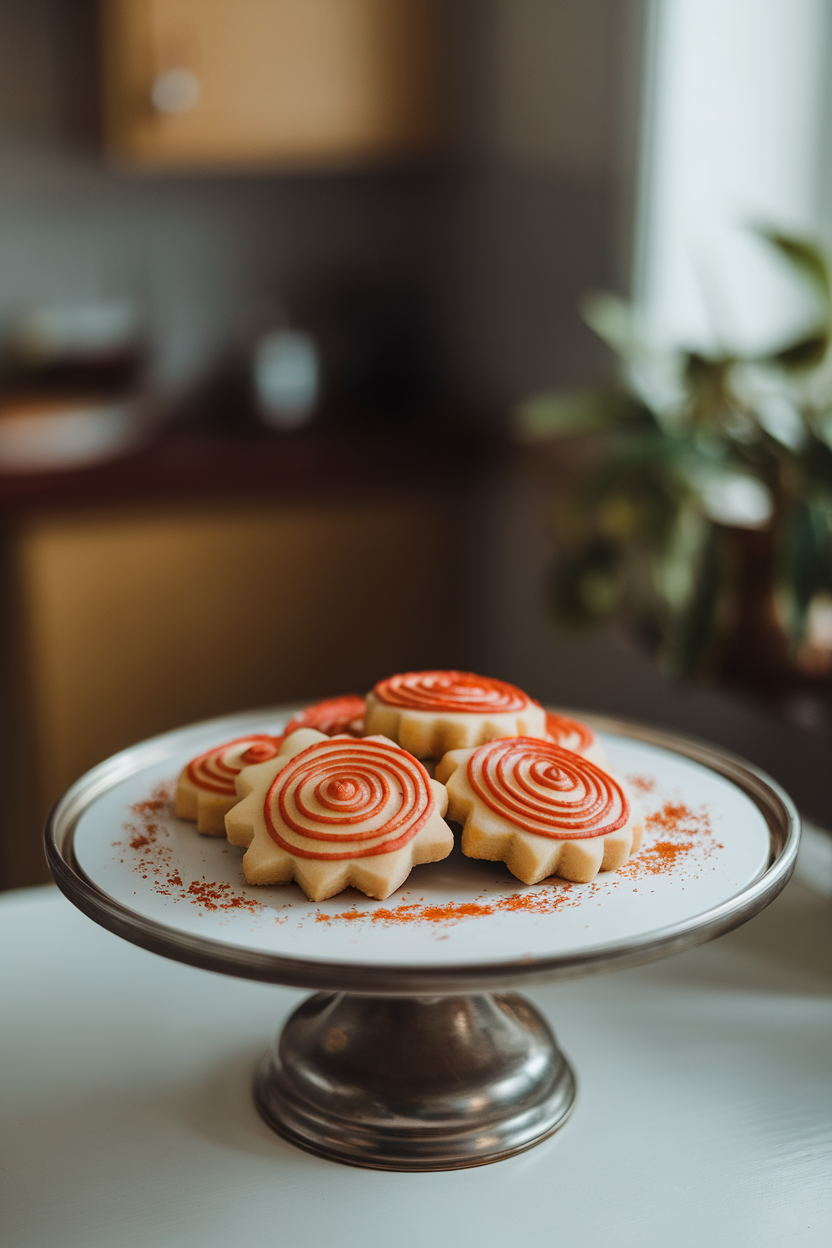
Pipe a spiral of orange icing over still-wet red, then pull toward the edge with a scribe tool to make pinwheel veins. The hypnotic swirl feels like leaves caught in autumn wind. Slight cinnamon flavoring complements the theme.
45. Bewitched Book of Spells
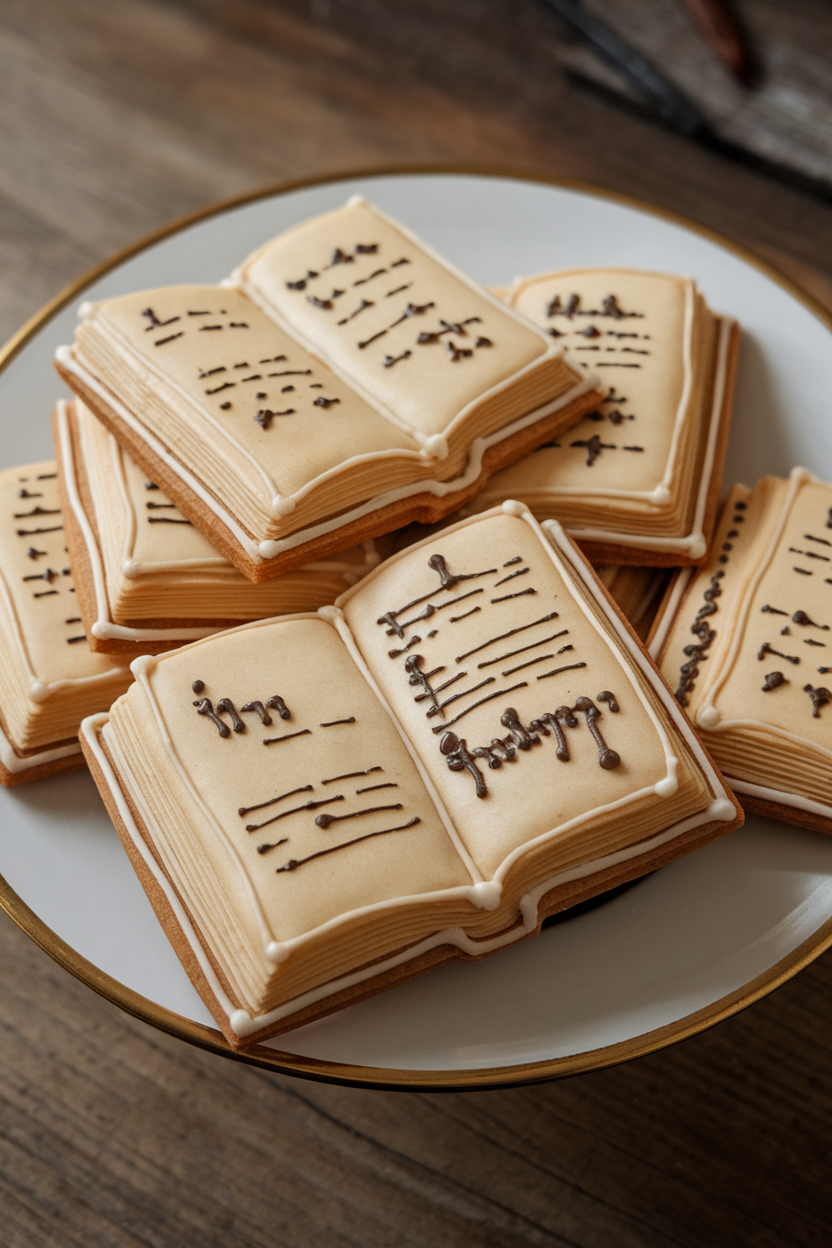
Outline a rectangle and flood with off-white. Use brown petal dust and a dry brush to antique the pages. Fine-tip icing pens add runic lettering or stars for an enchanted look.
46. Autumn Sweater Patterns
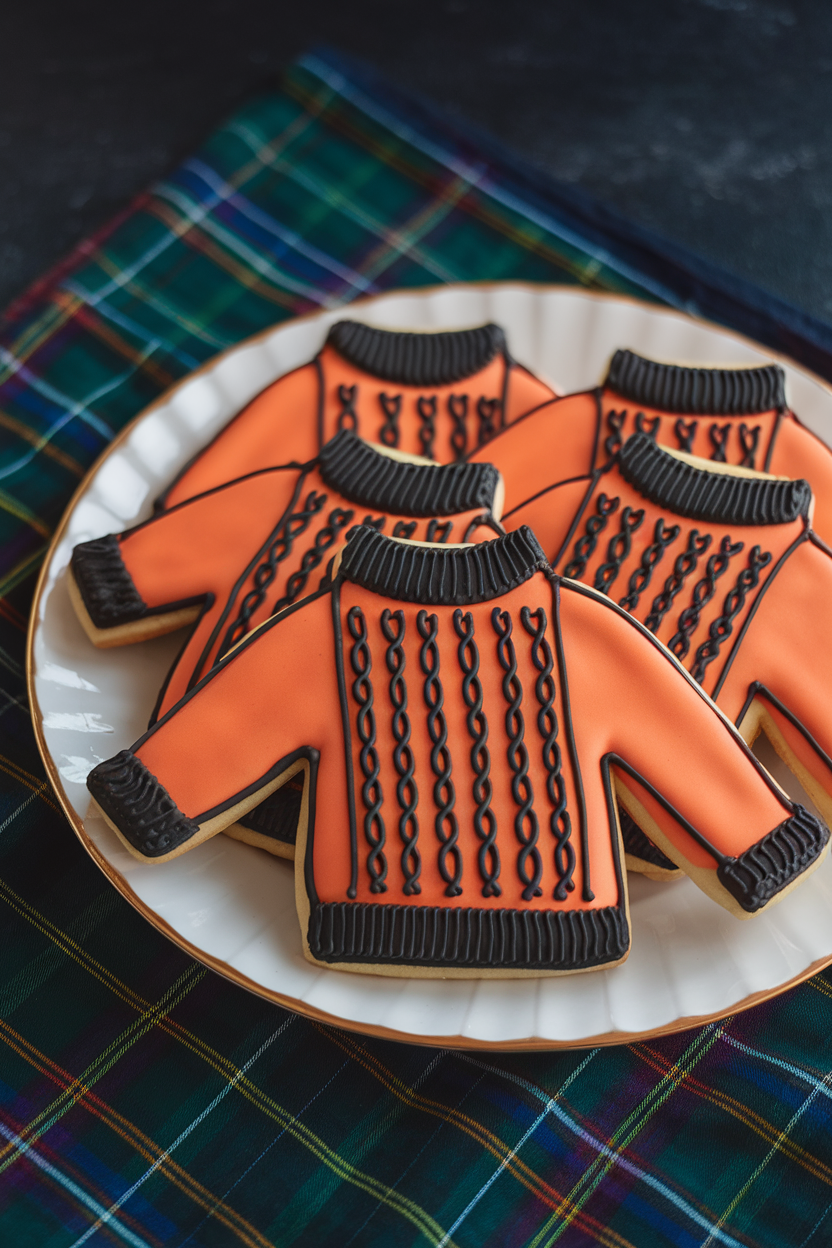
Royal icing thickened with extra sugar helps hold raised knit lines. Create cables, ribs, and tiny stitches using small round tips. These snug cookies make great gifts alongside pumpkin spice lattes.
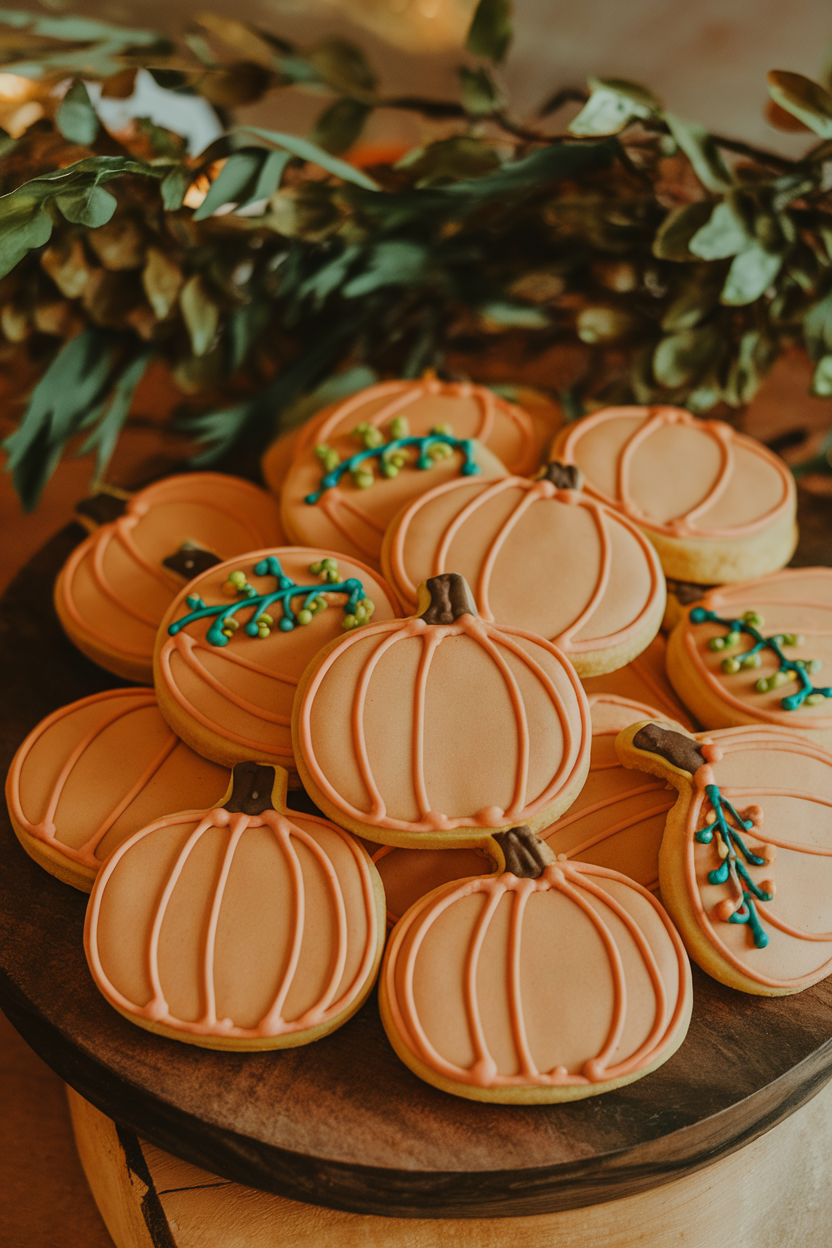
47. Playful Polka-Dot Pumpkins
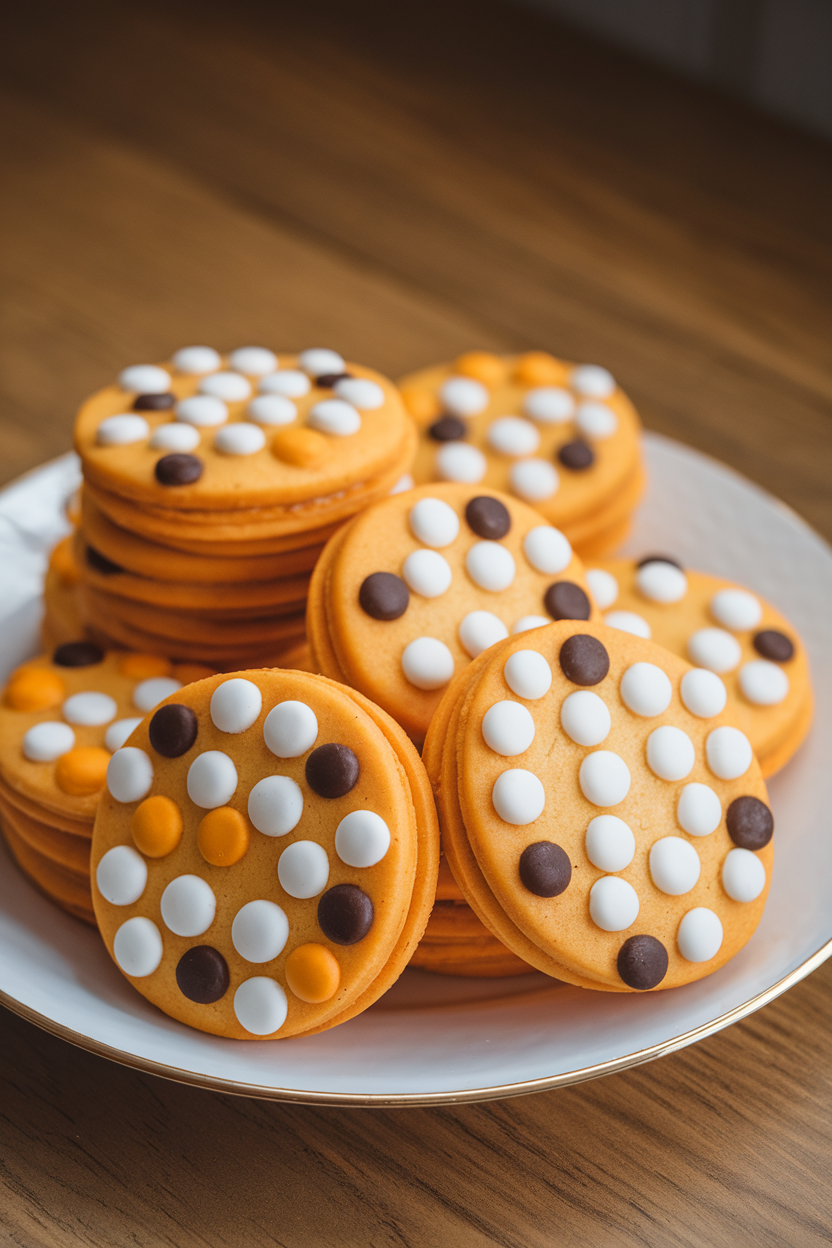
After flooding orange, pipe dots of contrasting colors while still wet so they sink flush. The result is smooth and eye-catching without extra piping afterward. Kids can help by randomly dotting a batch in minutes.
48. Hooting Barn Owl Feathers

Use a leaf tip to pipe overlapping feather strokes starting from the tail-end upward. Layer light and dark browns for depth. Two large white circles and tiny black pupils complete the wise expression.
49. Witch Cauldron Clouds

Flood the cauldron black and let dry. Pipe wispy streaks of colored icing that trail upward, then sprinkle fine glitter before they crust. The shimmering steam effect feels truly magical.
50. Sparkly Candy Corn Hearts
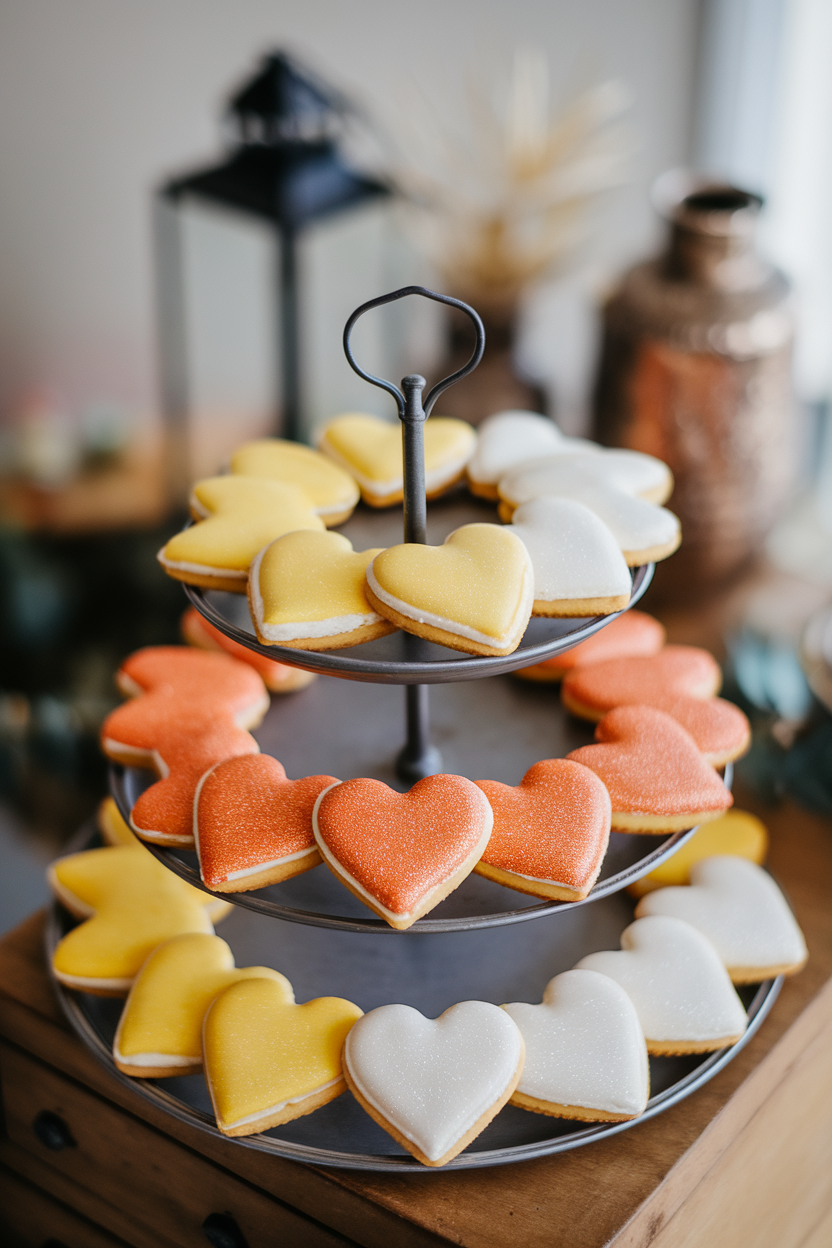
Hearts get a sweet twist with candy corn color blocking. Brush each stripe with a little corn-syrup glaze and dip in matching sanding sugar for sparkle. They fit seamlessly into both Halloween and fall-themed parties.
51. Cozy Campfire Flames
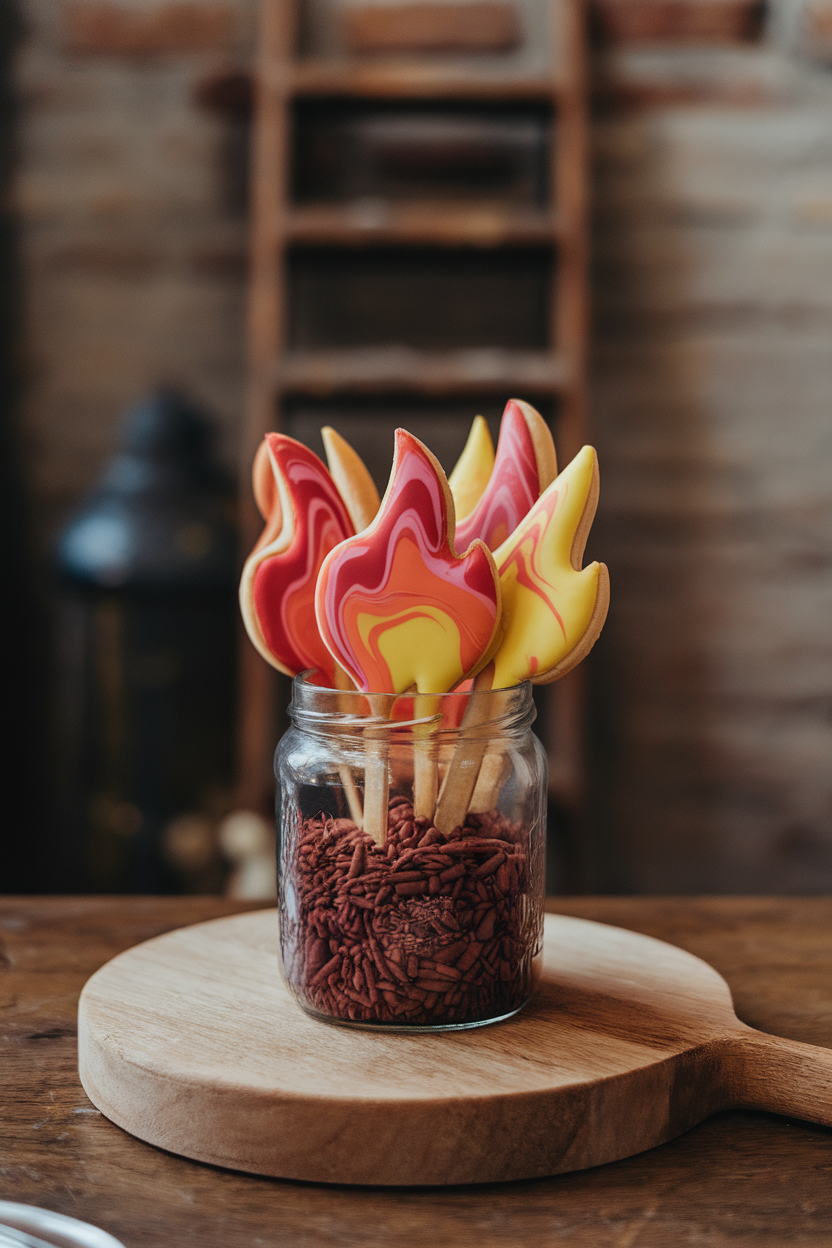
Flood with a marbled mix of warm colors, dragging upward with a scribe tool for flickers. Place cookies in crushed-cookie crumbs to resemble a fire pit. Serve beside chocolate “log” wafers for the full camping scene.
52. Crescent Moon Cats
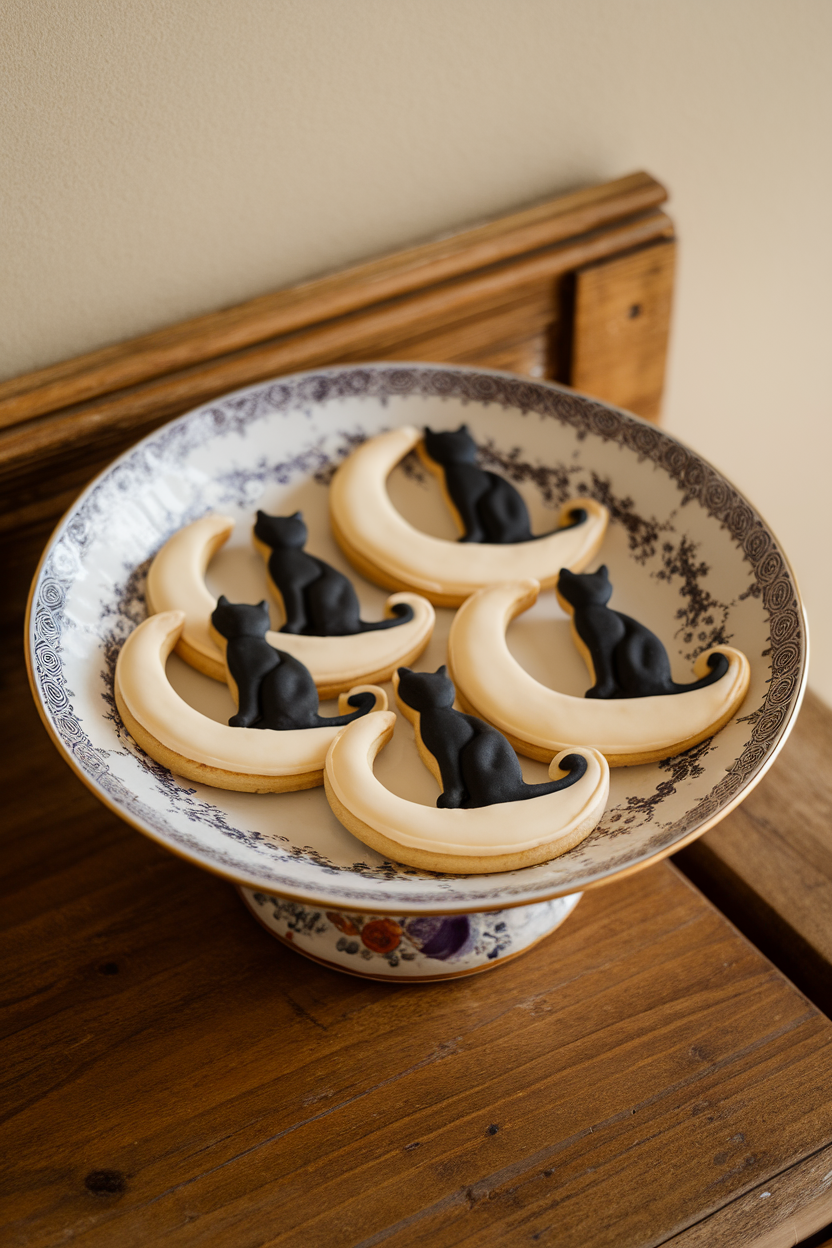
Attach a sitting-cat cut-out onto a crescent before baking so the shapes fuse together. Icing colors stay classic: buttery yellow for moons, midnight black for cats. A silver luster-dust sweep across the moon adds dreamy sheen.
53. Spiced Bat Wings
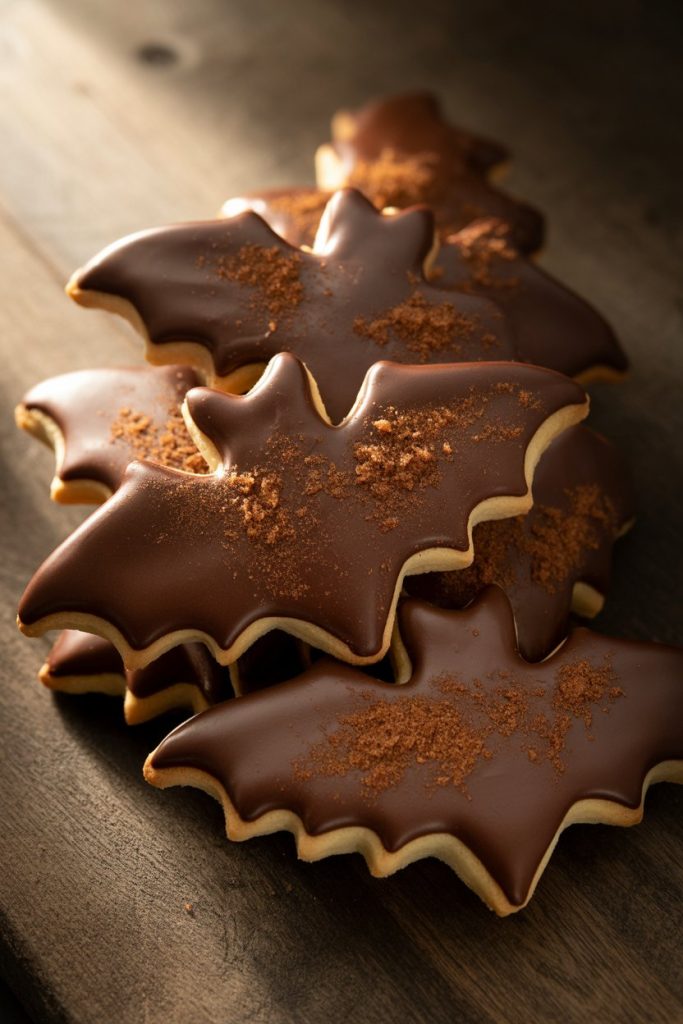
Cocoa powder in the dough deepens color and flavor. After cooling, dip wings in glossy chocolate icing, then dust with cinnamon sugar for a sweet-spicy crunch. They disappear faster than real bats at dusk.
54. Ghost in the Window Panes

Cut a square hole from half the cookies before baking, then fill the gap with crushed clear candy that melts into glass. Sandwich a ghost-iced mini cookie inside using royal icing as glue. Guests love the peek-a-boo effect.
55. Haunted Lantern Glow
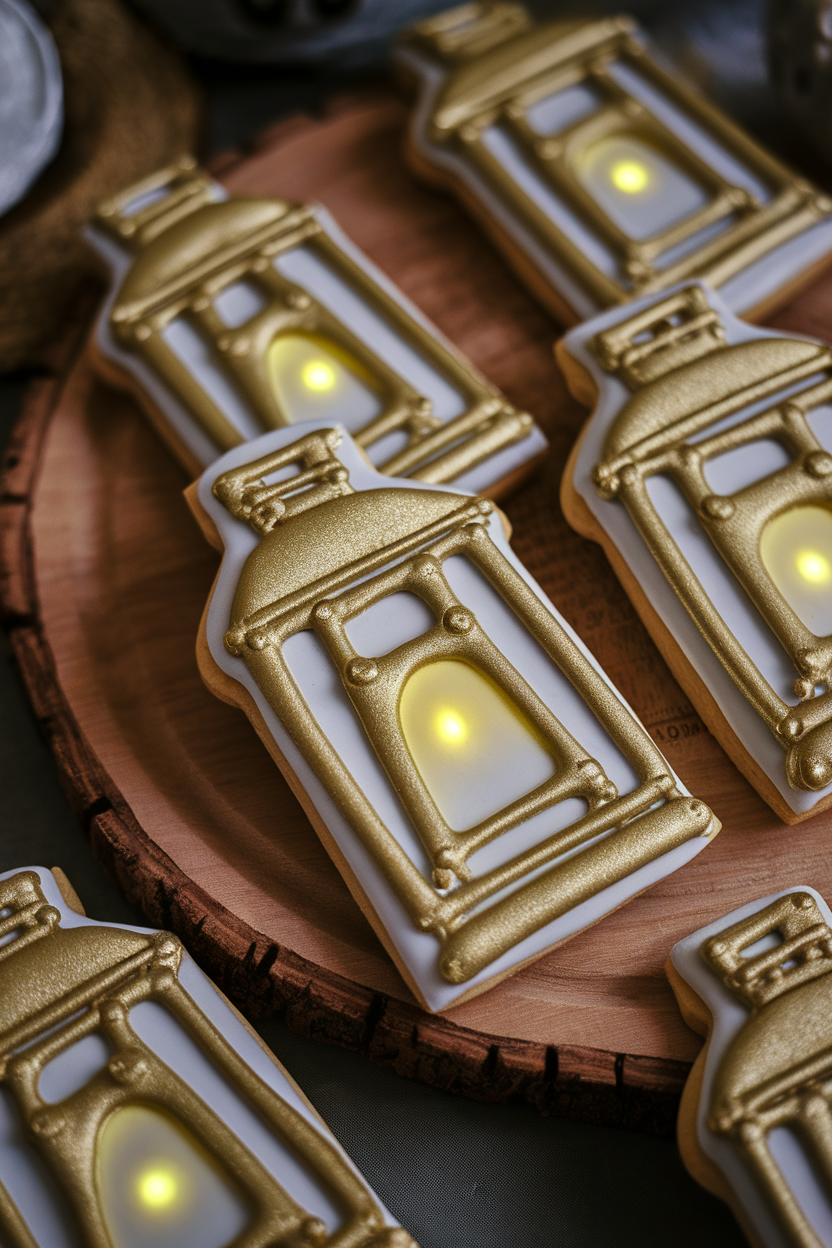
Flood with black, let dry, then brush on bronze or copper luster to mimic aged metal. Thin yellow icing fills the glass panel for subtle glow. Display them leaning against mini pumpkins for rustic charm.
56. Skeleton Key Shapes
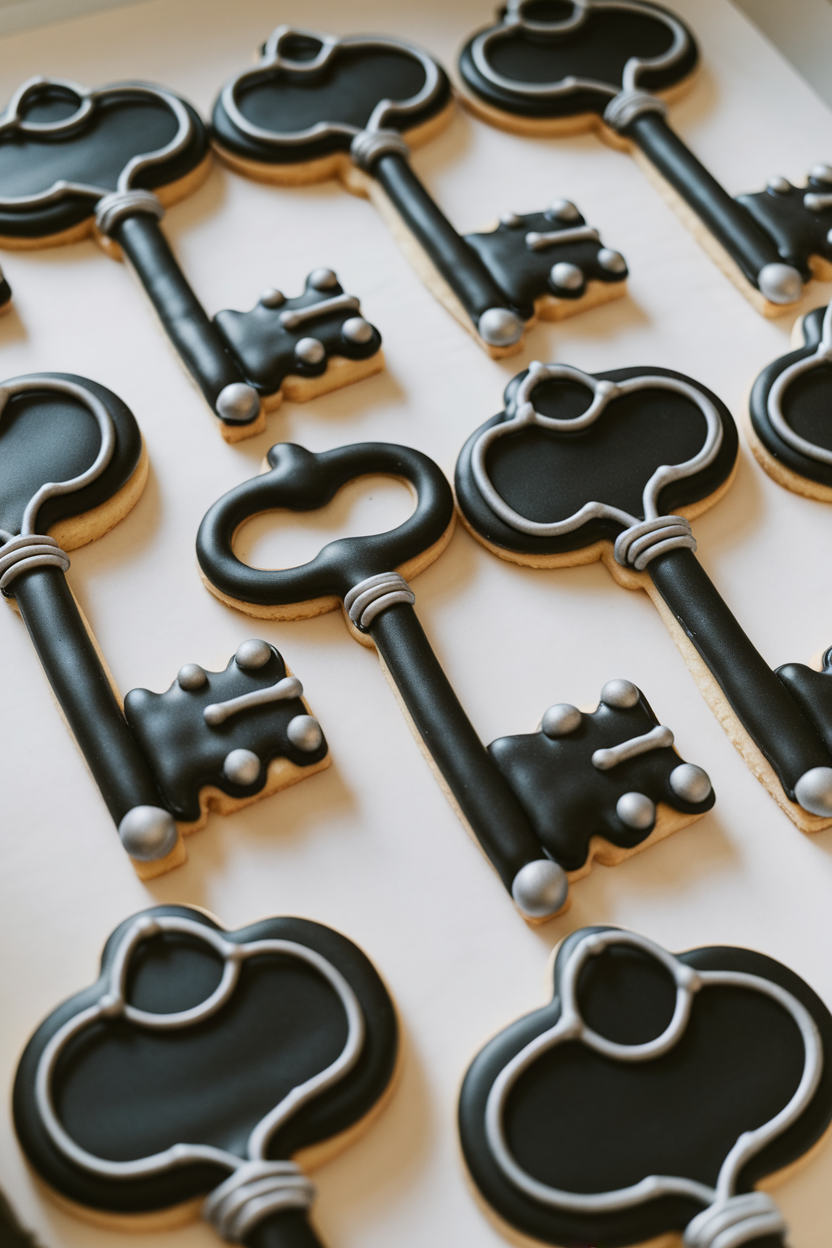
Long, narrow key cutters create elegant silhouettes. After black icing sets, paint small sections with edible silver to highlight grooves and teeth. Tie cookies with twine as party favors guests can unlock later—by eating.
57. Pumpkin Pie Slice Cookies

Use a large circle cutter, then cut the rounds into eight wedges before baking. Flood the center orange and outline a tan crust. A piped white rosette makes the “whipped cream” look irresistibly real.
58. Silly Zombie Faces
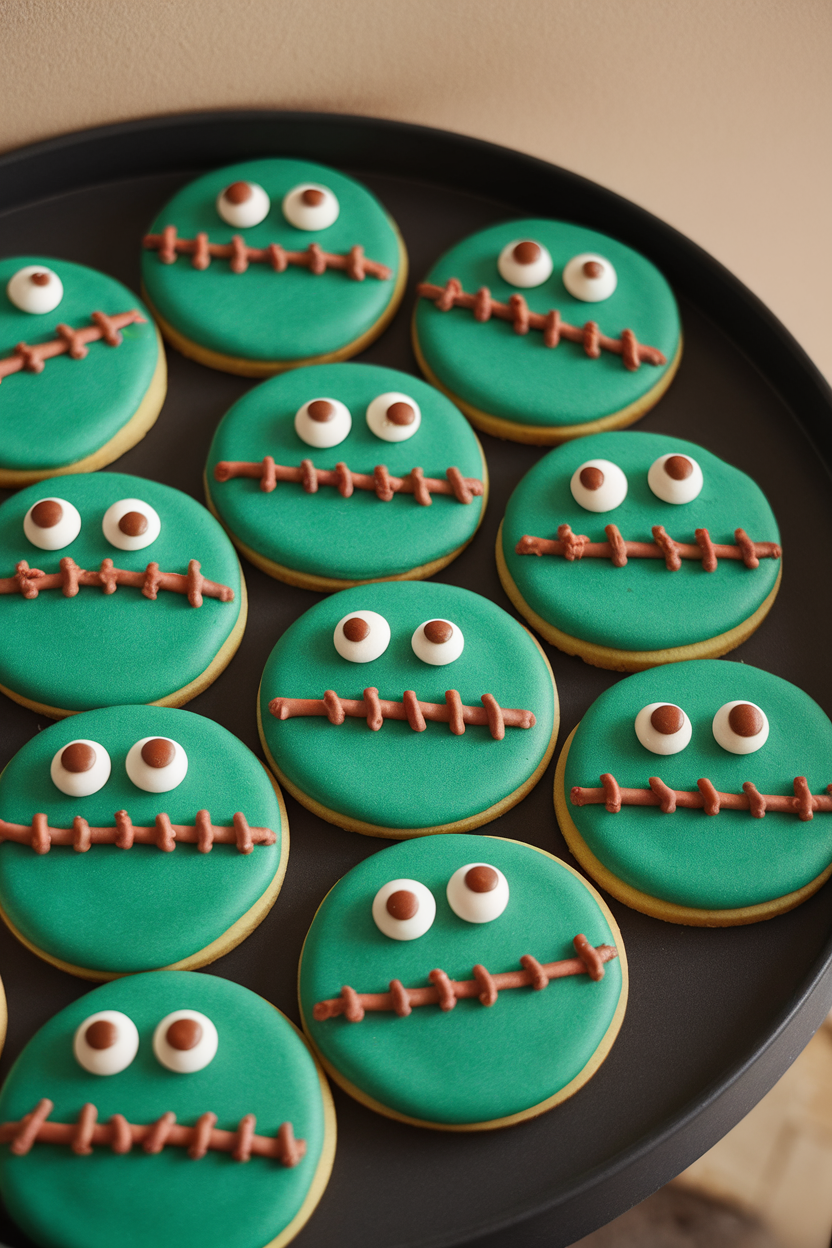
Color icing a ghoulish green and flood smoothly. Pipe crooked smiles, missing teeth, and stitched scars in black and red. Candy eyes stuck askew give hilarious undead character.
59. Harvest Wheat Sheaves

Flood a rounded oval in tan, then pipe upward strokes in two shades of yellow for stalks. A small red bow brings country-barn warmth to the design. Pair with leaf cookies for a full harvest assortment.
60. Trick-or-Treat Door Knockers
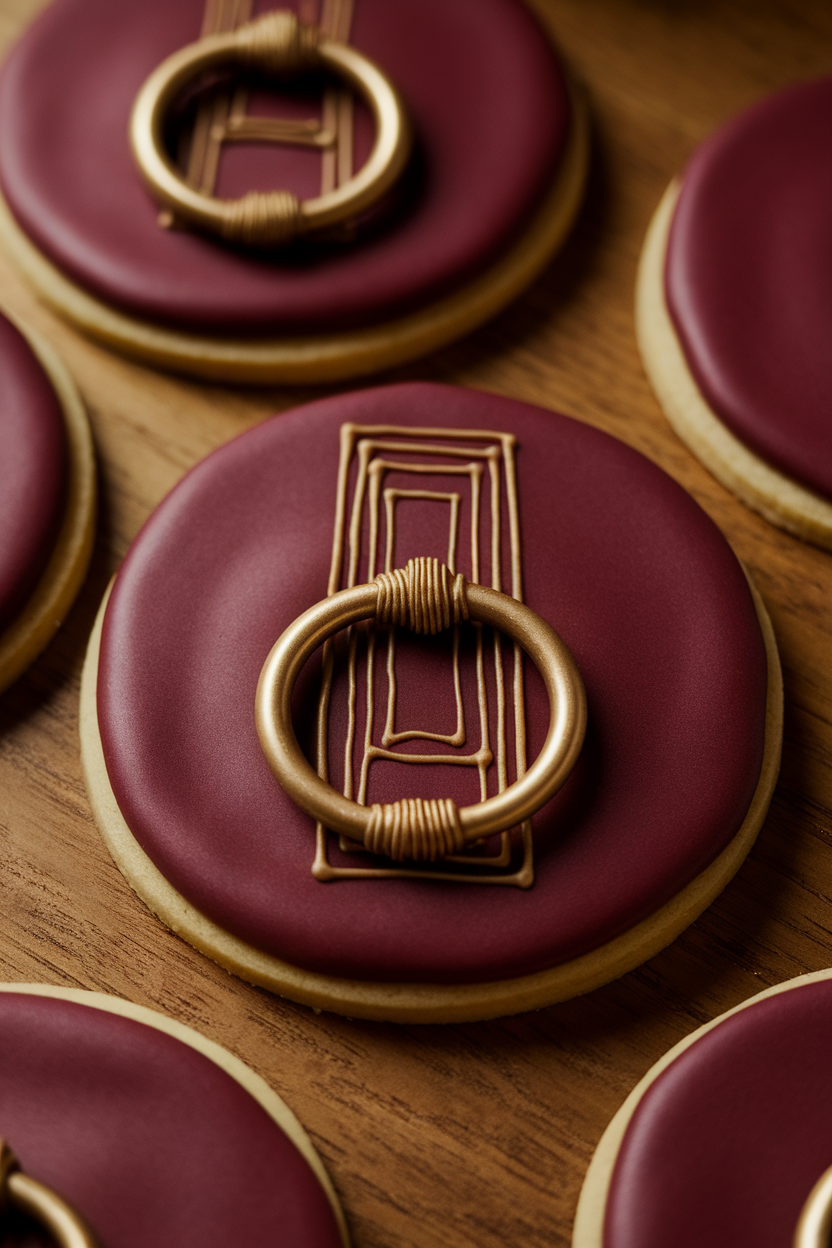
Flood circles burgundy, let dry, then outline a ring and bracket in gold piping. Luster dust burnished over the ring shines like real metal. Offer these alongside candy-bucket cookies for a clever doorstep theme.
61. Cobweb Corner Squares
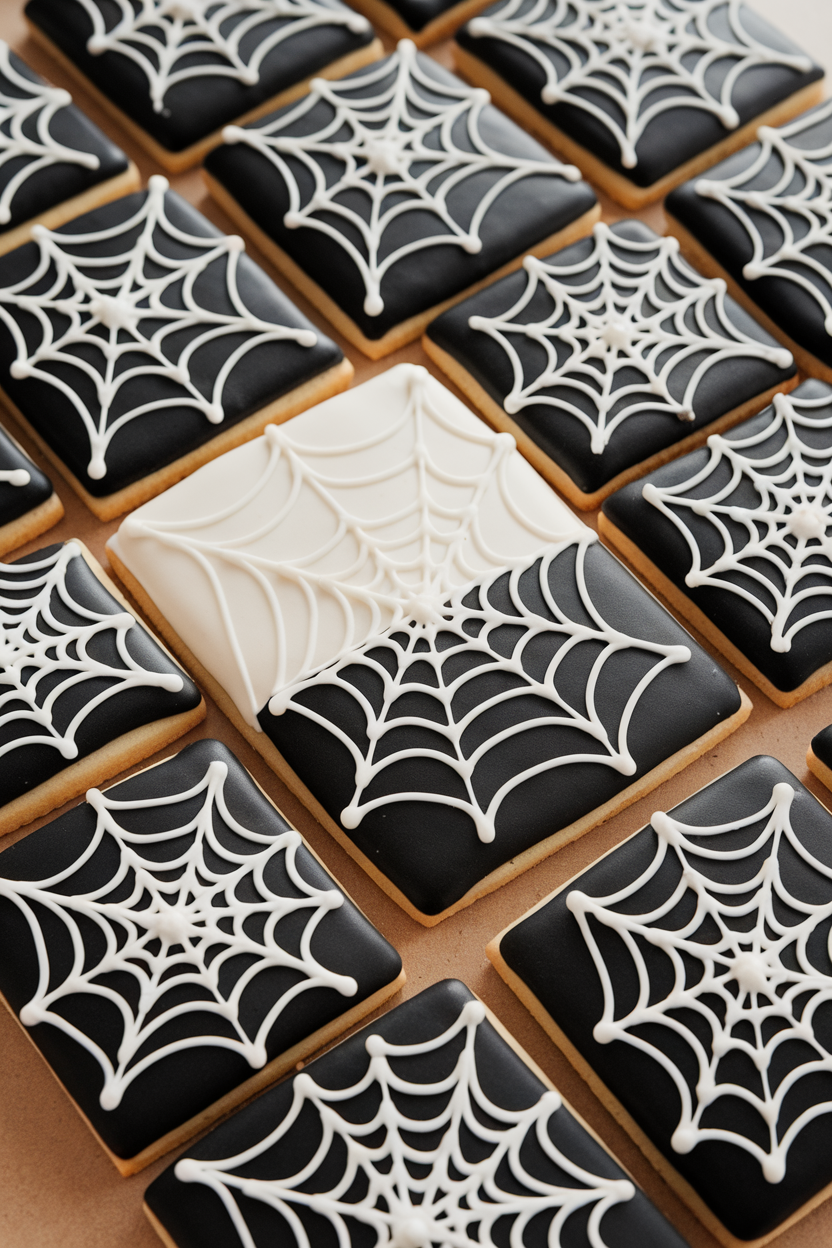
Flood half the square black and leave the other half bare. Pipe delicate white webs reaching from the corner across the dark side. Negative space keeps the design striking yet simple.
62. Leaf-Piled Pumpkins
Flood orange pumpkins first, then pipe minuscule leaf shapes around the base in red, gold, and brown. Layer leaves for depth like a real crunchy pile. Crunchy nonpareils add texture under the leaves.
63. Moonlit Pumpkin Carriage

A carriage cutter or freehand template brings fairy-tale flair. Soft peach icing makes the body subtle, while metallic gold wheels and accents elevate the look. Ideal for elegant adult Halloween teas.
64. Spooky Storybook Pages
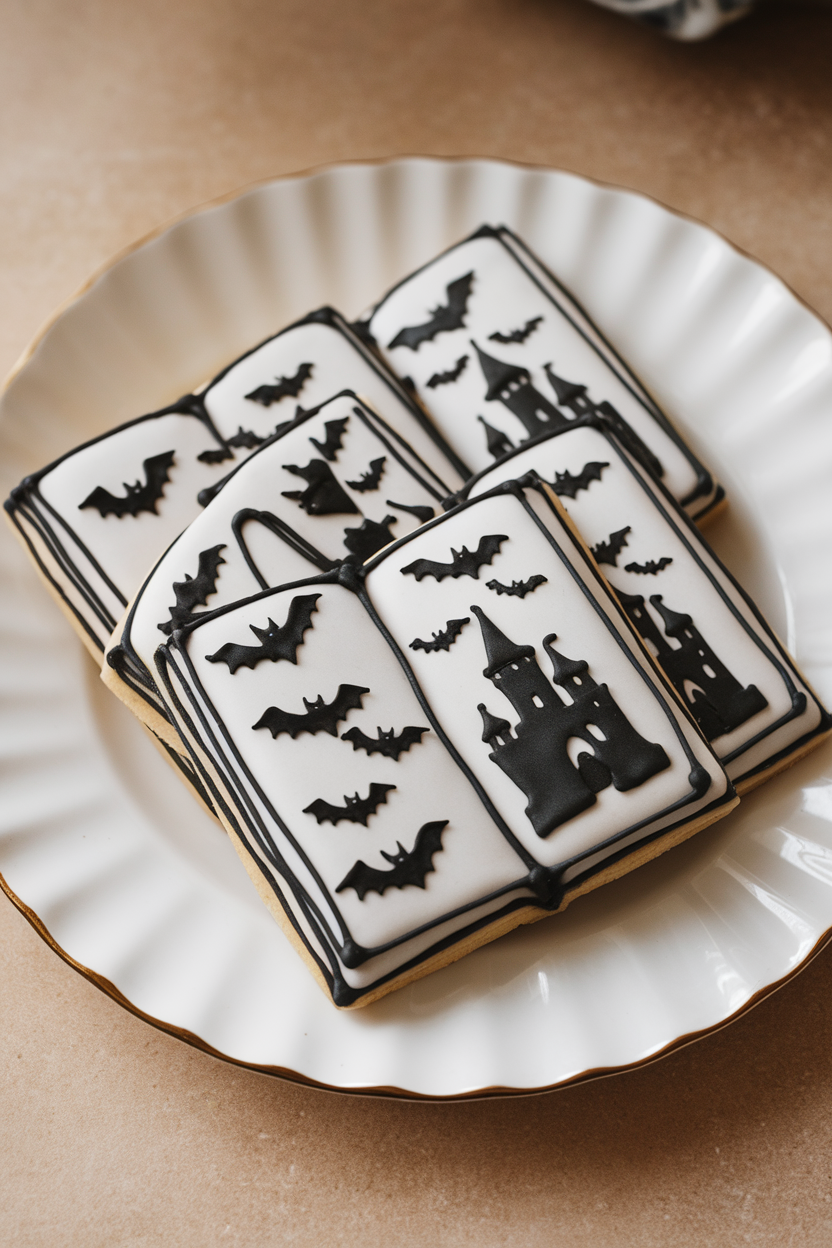
Flood the base ivory and allow to dry. Use edible ink pens to draw silhouettes and cursive script titles. A cocoa-powder dust down the center spine adds aged dimension.
65. Midnight Raven Silhouettes
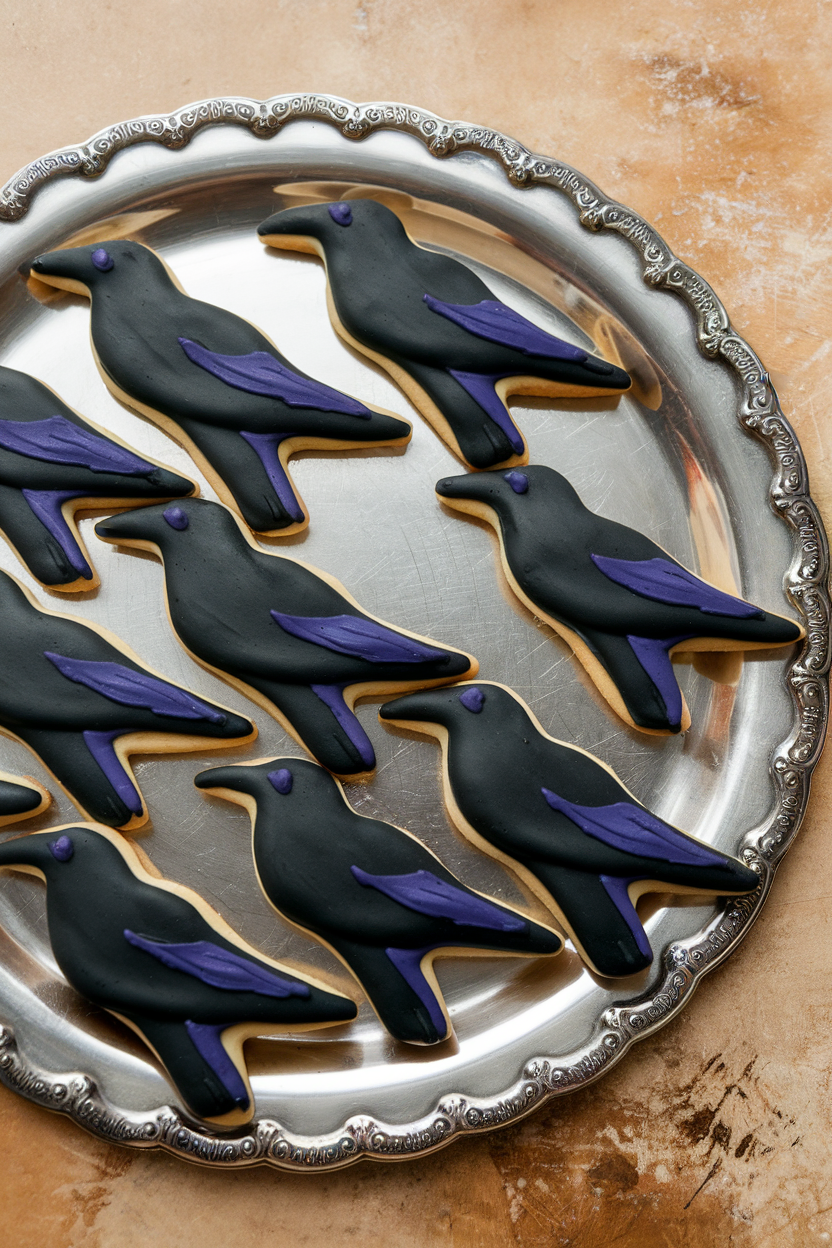
Cut slim raven shapes and bake until edges just brown for crispy detail. Flood in black, then brush with a hint of purple luster dust to capture feather iridescence. The sleek birds lend a dramatic finish to your Halloween cookie spread.
Nathaniel Lee is an avid cook, drawing on his decades of home cooking and fine dining experience. He is a contributing chef at Mashed, and his recipes and contributions have been featured in Tasting Table, Edible Arrangements, Insanely Good Recipes, and The Daily Meal.